
Fresh Water Fly
now browsing by category
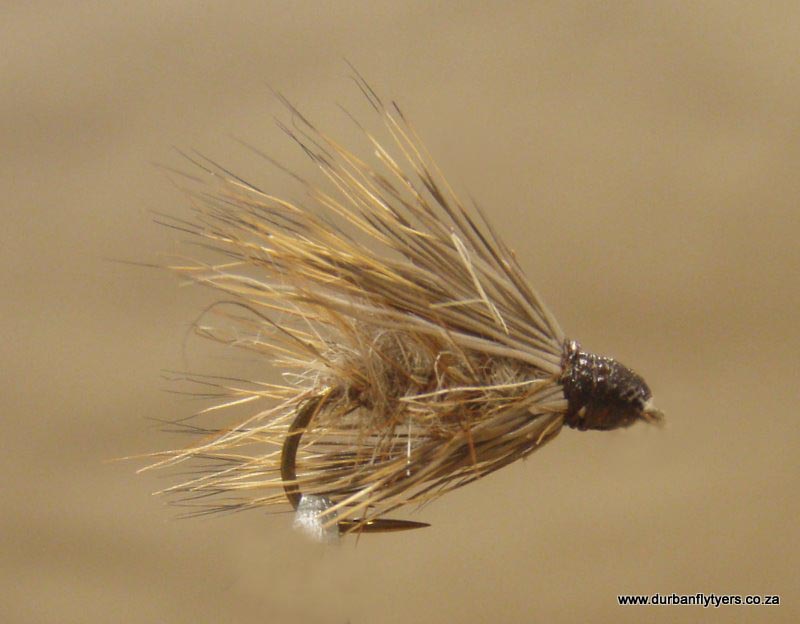
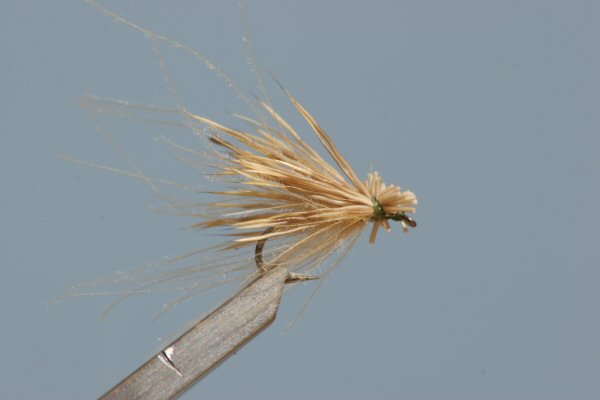
Elk Hair Caddis Variant
Elk Hair Caddis Variant |
|
This is a dry fly favoured by trout fisherman in small streams |
|
|
|
|
Materials |
|
| Hook | Dry Fly 2x # 12 or # 14 |
| Thread | 6/0 Thread – Brown |
| Body | Natural Rabbit Grey |
| Hackle | Orange Hen |
| Wing | Fine Elk Hair |
Tying Instructions |
|
| Tie in the thread and dress hook down to above the barb.
Take the hackle and stroke from tip to base to get the barbs ar right angles to stem. Tie in the hackle base end above the barb with the tip facing back. Spin a slender dubbing noodle using the rabbit then wrap forward to form the body. Tie off behind the eye leaving room for the head of the fly. Wrap the hackle forward in even turns to the same point and tie off. Take a bunch of elk hair (size to match the hook). Pull out the fluff at the base. Stack in a stacker to get the tips even. Tie in the wing behind the hook eye. The wing should be slightly longer than the hook. Cuta way all the elk hair that extends beyond the hook eye and the form a thread head over the deer hair. |
|
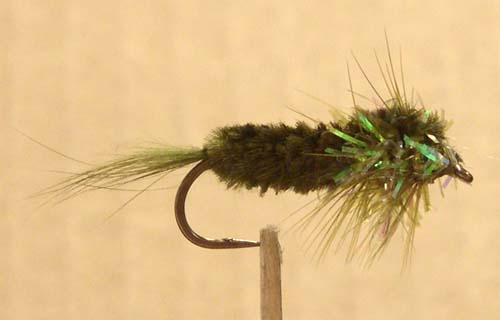
Montana Nymph
Montana Nymph |
|
|
|
|
Materials |
|
| Hook | Long Shank Nymph 6 to 12 |
| Tail | Rabit Fur Olive or colour of choice |
| Body | Chenille olive or colour of choice |
| Legs | Hackle Olive |
| Thorax | Cactus Chenille |
| Wing Case | Body Colour Chenille |
| Head | Black cotton whip finish and cement |
Tying Instructions |
|
| Dress hook with thread and tie in a small clump of Rabbit fur. Any colour from black olives to brown.Tie in the body chenille and wind forward to 3/4 up the shank. Tie off on top of the hook as this piece will later be used as the wing case.
Tie in a hen hackle at this point (hackle must match gape of hook about 30% wider) Then tie in the cactus chenille wrap forward leaving room for the head and tie off. Wrap the hackle carefully through the thorax about 3 turns and tie off. Pull the body chenille forward over the thorax to form the wing case and tie off at the eye. Make a neat cotton head and cement making sure the eye does not become clogged with cement. Bret gave us a good tip for cleaning the eye of the hook, he pulls the left over piece of hackle through the eye. This cleans it up very nicely. |
|
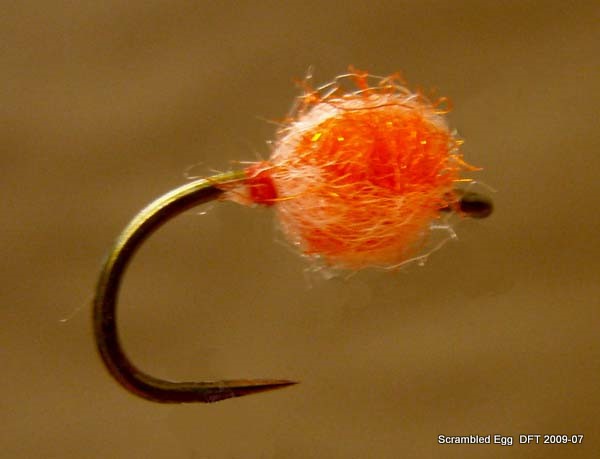
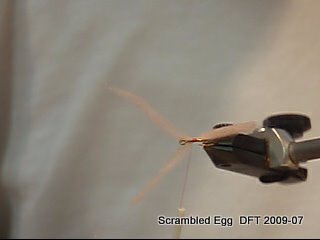
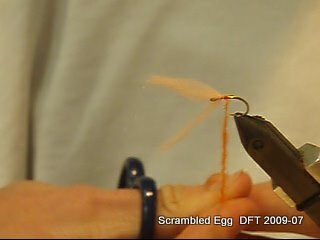
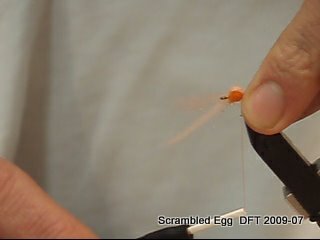
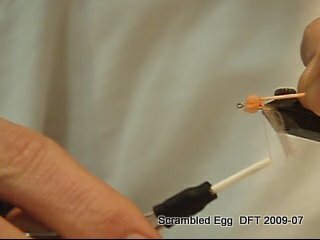
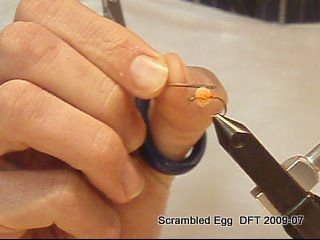
The Scrambled Egg
The Scrambled Egg |
|
A hybrid between a standard Crystal Dubbing Egg and Jim Pettis’s Unreal Egg |
|
|
|
|
Materials |
|
| Hook | Tiemco 2488H # 12 or # 14 |
| Thread | 6/0 Uni Thread – FL. Orange or Red |
| Under Body | Harline Dubbin, Inc. STS Trilobal Dub – Hot Orange |
| Overbody (Cacoon) | Wapsi Egg Yarn – Salmon Pink or Light/Faded Pink |
Tying Instructions |
|
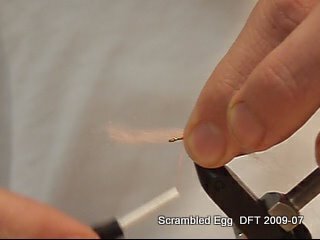
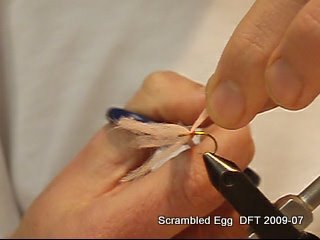
| Step One:Tie in the thread in the middle of the hook shank.
Take note, rather use the least amount of Egg Yarn as you are using it to create a translucent ‘cocoon’. Cut a 8cm section of Egg Yarn – this is then split in the length as you will only be using half of the original diameter of egg yarn to tie this fly.
This section is then split lengthwise once more, keep the other section as this will be used in the next step. (You should be left with two ¼ pieces of Egg Yarn)
Tie this section in on top of the shank and secure with two turns of thread; the section you will be using must be facing toward the eye of the hook as you will eventually tie off at the back of the hook (closer to the bend)
Now split this tied in Section and then using your thumb and index finger, turn this split section on the shank so that it is now located at the bottom of the shank. Viewed from the top is should look like a Y. Step Two: Tie in the Section of egg yarn that was kept aside in step one on top and middle of the shank. Now take a couple of turns toward the eye of the hook to secure both sections of Egg Yarn ( the newly tied in section and that piece located on the bottom of the shank) The finished fly must be located in the middle of the shank so be sure to leave enough space behind the eye.
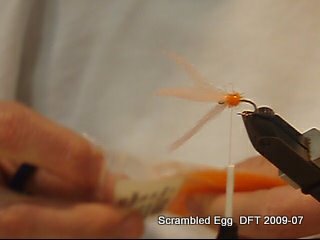
At this point you should have three ‘pieces’ of egg yarn sticking out towards the front of the hook over the eye. Step Three: Spin the dubbing onto the thread and form a round underbody the size of the actual egg.
Start in the middle of the shank, cover those wraps that secure the egg yarn and end off towards the back of the hook. Your thread should be located behind the egg body at this point as this is where you will tie in the Egg Yarn. Optional : Cut away any strands of dubbing that protrude past the actual body of the fly. Step Four: You now take each piece of each yarn individually and for the ‘cocoon’ around the dubbed body. Start with the section you tied in first and that is located on the top of the shank.
Pull it over the top and to the back of the dubbed body covering the top half of the body and while trapping it with two loose turns of thread, leave some slack in the yarn as to form a bubble in the material. You can also use a needle to ‘lift’ the Egg Yarn off of the dubbed body as to achieve the desired effect. Now repeat this step for the other two pieces of yarn covering the bottom half of the body.
Making sure that the egg yarn covers 90% of the body in a translucent ‘cocoon’, whip finnish and cover thread wraps with head cement.
|
|

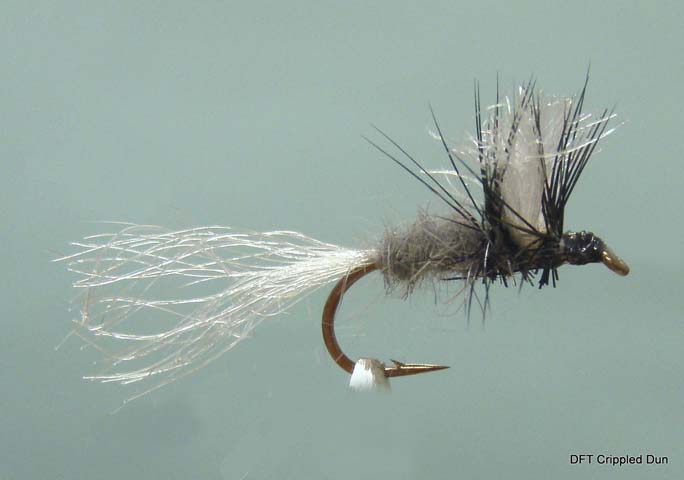
Crippled Dun
Crippled Dun |
|
A dry fly which does well for trout. |
|
|
|
|
Materials |
|
| Hook | Dry Fly #10 to #18 |
| Thread | 6/0 or finer (colour of choice) |
| Chuck | Z-Lon Grey or Dark Grey polypropylene yarn |
| Body | Grey Z Lon Dubbing |
| Wing | White polypropylene yarn |
Tying Instructions |
|
| 1) Dress shank down to above the barb.
2) Tie in the chuck, this should be longer than the hook the hook. 3) Tie in the wing leaving enough room for the head (about 1/4 from eye) using figure of 8 wraps. 4)Pull the wings upright and secure in this position using a few wraps of thread around the base. 5)Return the thread to the point where the shuck is tied in. Dub the thread forming a tapered noodle. Note: When viewing from the top the dubbing should be twisted in a clockwise direction to prevent unwinding as it is wrapped around the hook shank. (reverse for Left Handed tyers) 6) Wrap the dubbing forward forming a tapered body. 7) Tie in the hackle just behind the wing with the tip toward the back of the fly. 8) Dub the hoohshank right up to the eye forming the thorax and head. 9) Now wrap the hackle forward, two turns behing the wing and two turns in front, Tie off and whip finish. 10) Pull the wing upward and trim just above he hackle tips. 11) Turn the fly and trim the hackle directly below the body forming an inverted V when viewed from the front. |
|
The Good Doc’s Beetle
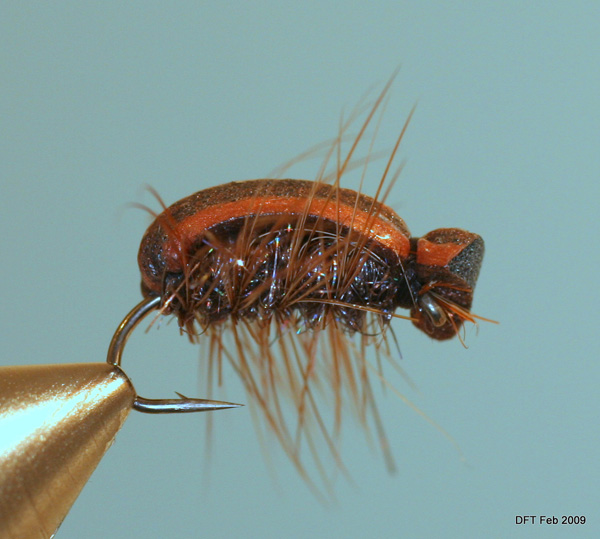
The Good Doc’s Beetle |
|
A local dry fly that is especially deadly for yellowfish. |
|
|
|
|
Materials |
|
| Hook | Grip 12804 #12 to #16 |
| Thread | Black 3/0 |
| Upper Body | Sparkle Dubbing |
| Body | 2-3 mm Black High Density Foamb |
| Body Prep | Paint with Heritage Metalic Bronze |
| Legs | Brown or Furnace Hackle |
Tying Instructions |
|
| 1) Prepare the foam by cutting into strips with a craft knife. The top should be beveled at 45 deg on both sides. (width to suit hook size)
2) Paint the prepared strips on both sides with the bronz metallic craft paint and hang to dry. Before it hardens give an overcoat of Heritage Seal Skin. 3) Hang the strips to dry. 4) Dress the shank of the hook with thread and before the paint hardens tie in a strip of foam behind the hook eye flat side up. 5) Stretch the foam back toward the bend of the hook and tie down the foam in open turns finishing above the barb with an no. of tight wraps. 6) Strip the filoplume off the hackle and tie in at this point with the tip facing back. 7) Form a dubbing noodle and dub over the foam underbody forward to behind the hook eye. 8) Palmer the hackle forward to the same point and tie off. 9)Pull the foam body over the top and tie off just behind the hook eye. 10) Clip the excess foam forming the beetles head. |
|
RAB
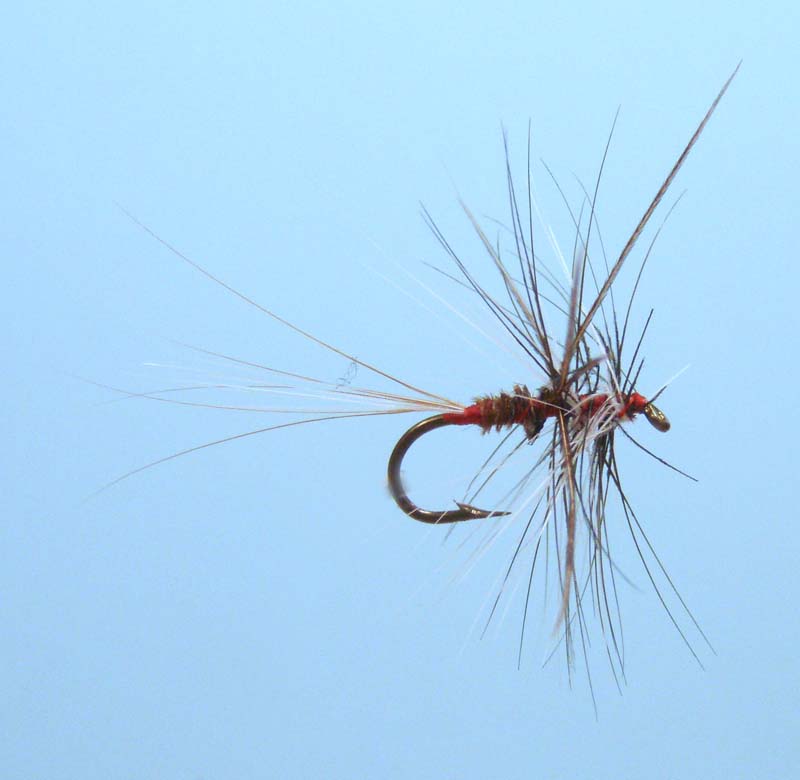
RAB |
|
One of SA’s most famous dry flies, the Red Arsed Bastard |
|
|
|
|
Materials |
|
| Hook | Dry Fly 12-16 |
| Thread | Red 6/0 or finer |
| Tail | Hackle Fibres |
| Body | Pheasant Tail |
| Legs | Pheasant Tail |
| Hackle | Brown or Furnace and White or Cream Hen |
Tying Instructions |
|
| 1) Dress the hook shank with thread.
2) Tie in a mixture of white and brown hackle fibres above the barb. 3) Wrap the thread forward 1/3 of shank. 4) Tie in a bunch of about 5 pheasant tail fibres at their mid point with the tips pointing forward. 5) Wrap the butt ends of the pheasant tail forward forming a body and tie off . 6) Spread the pheasant tail tips evenly around the hook shank and secure in position with a few wraps. 7) Tie in the Brown hackle just ahead of the legs with the shiny side and tip facing back. 8) Tie in the other hackle behind the hook eye with tip facing forward (leave enough room for a small thread head) The thread should now be just behind the hook eye. 9)Wrap the brown hackle forward to where the thread is. 10) Wrap the thread back through the hackle to just in front of the legs. Trim off the brown hackle tip. 11) Now wrap the white hackle back through the brown hackle toward the legs then wrap the thread forward to behind the hook eye securing the hackle in place. 12) Form a small thread head and tie off. |
|
MSK (Mikes Scalie Killer)
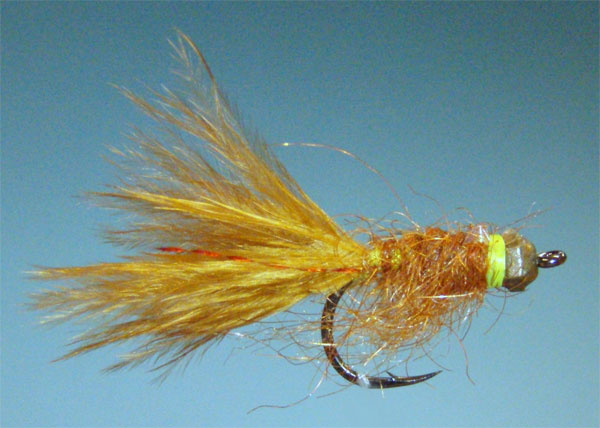
MSK (Mikes Scalie Killer) |
|
A yellowfish variation of the woolly bugger. |
|
|
|
|
Materials |
|
| Hook | Daiichi DHSS #3 or smaller |
| Thread | Chartreuse 3/0 or finer |
| Head | Tungsten Bead pref. faceted |
| Tail | Filoplume from Schlappen Hackle + Flash |
| Body | Sparkle dubbing |
| Rib | Fine Copper Wire (optional) |
| Wing Case | Flashabou |
| Legs | Teased out dubbing |
Tying Instructions |
|
| 1) Thread bead onto hook and dress the hook shank with thread to above the barb.
2) Cut a bunch of filoplume from the base of a hen hackle. Tie this in above the barb using the pinch method. 3) Tie in one strand of flash either side of tail as well as the copper wire for rib if desired. 4) Form a dubbing noodle at the tail tie in point and wrap forward 2/3 along hook shank forming the body. 5) At this point tie in the flash for the wing case on top of the hook. 6) Carry on dubbing in front of the flash right up to the bead. 7) Pull the flash over the top forming the wing case and tie off behind the bead. 8) Keep wrapping the chartreuse thread behind the bead forming a neat chartreuse band behind the bead. 9)Whip finish and apply a small amount of head cement. 10) This fly is very effective for Natal Scalies especially when the water is not clear and can be tied in browns and greens. |
|
Marco’s Bass Muddler
Marco’s Bass Muddler |
|
Marco’s variation on the bass muddler. |
|
|
|
|
Materials |
|
| Hook | Size #4 long Shank |
| Thread | 3/0 Mono Colour to match |
| Overbody | Flourescent Fritz or Chenille (Crystal) |
| Wing | Deer Hair topped with Marabou and Peacock Herl |
| Collar | Spun Deer Hair |
| Head | Spun deer hair clipped to shape |
| Tail | Marabou or Bucktail (red orange chartreuse) |
Tying Instructions |
|
| 1. Start thread above barb of hook and tie in flat section of foam.
2. Tie in the tail (1/3 length of hook shank) and fritz. Wind the thread forward to about 1/2 the shank length from the eye. 3. Wind the fritz forward over the foam and tie off at the same point. 4. Stack a clump of deer hair in a stacker and tie in directly in front of the Fritz on top of the hook. The tips should extend to the bend in the hook. 5. Tie in a small bunch of marabou directly over the deer hair (colour of choice) and 4-5 Peacock Herls directly on top of that. 6. Stack a thick clump of deer hair in the stacker and spin a collar around the hook shank. 7. Repeat the above step (stacking no longer required) over and over until the front third of the shank is covered. make sure to pack the hair tightly back after each application. 8. Tie off the thread behind the hook eye and apply a drop of head cement, then shape the head with scissors or a sharp razor blade. The larger the head and collar the better the pattern will float. Note: The collar particularly the bottom provides most of the buoyancy to the fly. Clipping the bottom close to the hook shank results in a loss of buoyancy thus allowing the fly to fish sub surface. |
|
Fishing Instructions |
|
| Due to the wind resistance of the pattern at least a 5/6 weight rod is required. Cast in the direction of the bank (as close as possible) or structure, allow to settle for a few seconds then give a a few rapid short strips interspersed with pauses of a few seconds. Continue to strip until over the drop off and the repeat the sequence gradually covering all the water in front of you. The idea is to create sufficient disturbance to test the agression of the bass. By the way many a wary trout has been caught in the shallows in the early morning and late evenings on windy/stormy days. | |

Fire Tiger Clouser
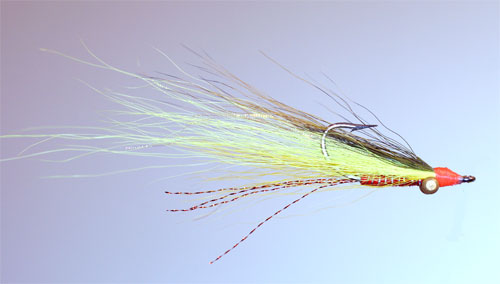
Fire Tiger Clouser |
|
A fantastic tigerfish fly. |
|
|
|
|
Materials |
|
| Hook | 1/0 SS |
| Thread | Red Or Clear 3/0 |
| Tail | 4 strands of Burnt Orange Crystal Flash |
| Body | Red Floss |
| Wing | Yellow Chartreuse and Dark Buck tail |
| Eyes | Dumbbell Eyes |
Tying Instructions |
|
| 1) Tie in the Dumbbell eyes behind the eye leaving room for the head.
2) Tie in 4 strands of crystal flash for the tail above the hook barb. 3) Dress the hook shank with a few layers of red floss and paint on a few layers of Sally Hanson’s. 4) When this has dried. Reverse the hook in the jaws and tie in a small bunch of yellow buck tail in front of the eyes. At this point a few strands of flash can be added. 5) Tie in a small bunch of Chartreuse buck tail on top of the Yellow and an even smaller bunch of a dark coloured buck tail to complete the wing. 6) Finish off the head with red or chartreuse thread and apply your favourite head cement. |
|
CDC & Elk
CDC & Elk |
|
This version of the Elk Hair Caddis was developed by Hans Weilenmann. |
|
|
|
|
Materials |
|
| Hook | Dry Fly Hook #12 to #20 |
| Thread | Tan 6/0 |
| Body | CDC |
| Wing | Elk or Deer Hair (Klipspringer works well) |
Tying Instructions |
|
| 1) Tie in a spade shaped CDC feather by its tips above the barb of the hook.
2) Wrap the CDC forward around the hook shank forming the body. 3) As the CDC gets closer to the hook eye more and moor loose strands of feather appear. Stroke these back away from the hook eye and tie off just behind the eye. Leave enough room for the wing and head. 4) Stack a small clump of Elk hair and tie in the wing with a few tight turns. The wing should not extend beyond the bend of the hook. 5) Form a neat head under the Elk hair, whip finish and apply a drop of head cement. |
|
Hans Weilenmann Fishing Instruction Quote |
|
| The CDC & Elk is a very versatile pattern. While originally designed to be a dry caddis imitation, it has proven to be much more than just a ‘better’ caddis pattern! It is by far my most productive dry to use during mayfly hatches, as well as my staple search pattern during hatchless periods. Fish it as an emerger in the film. Or as a straight wet. It has proven to cover the full spectrum of dry, ‘damp’and wet. As an extremely effective 2-materials 2-minutes-to-tie this is one hard to pass up pattern. I suggest you try it! | |
 D5 Creation