
Archives
now browsing by author
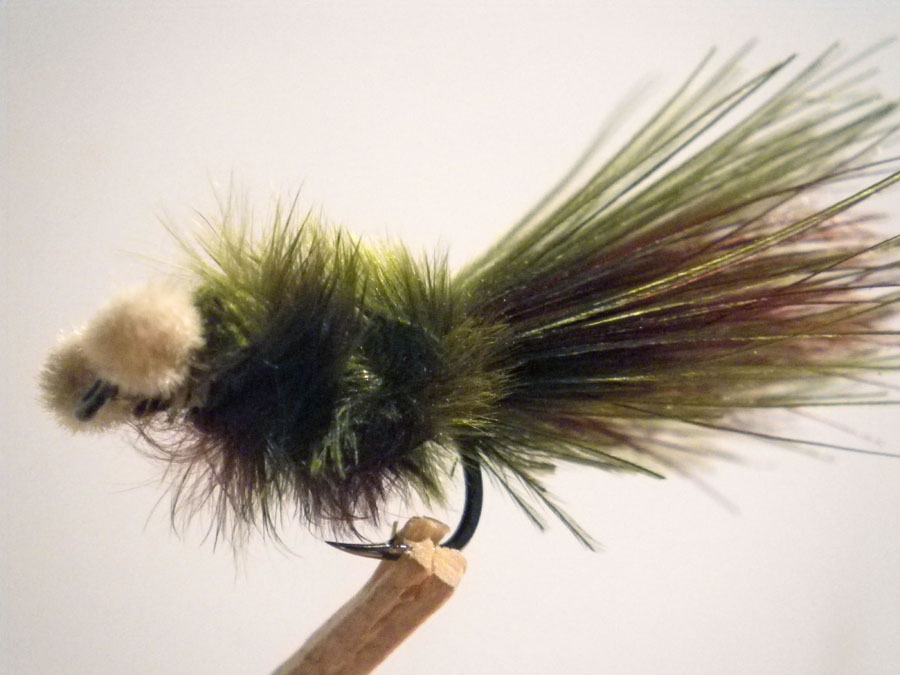
Kamberg Nymph
Kamberg Nymph |
|
By Mike Blackhouse |
|
 |
|
Materials |
|
| Hook | TMC 9300 #10 or equivalent |
| Thread | 3/0 tan or olive |
| Tail | Blood quill marabou olive together with a few Blood Quill marabou fibers in brown |
| Body | Same as for tail |
| Eyes | Tan chenille |
| Weight | 7 to 14 turns of .010 lead wire |
Tying Instructions |
|
| 1) Lay a thread base from the eye to the bend of the hook building up the thread at the bend to support the tail.
2) Tie in the chenille eyes figure of eight style leaving the tags attached to be used later. 3) Wind in 7 to 14 turns of lead wire starting directly behind the eyes wrapping towards the bend. 4) Tie in olive and brown blood quill marabou. The tail should be 1.5 length of the hook shank. Make sure that the tail is tied in behind the thread mounting at the bend of the hook so it stands up proud and tail wrap is largely avoided. 5) Twist and wrap the rest of the marabou fibers back to the eye of the hook. Pull hard on the thread as you tie off so that the fly does not become unwound during use. 6) You will find that there is a very small gap between the tie off point and the eyes which will be filled with dubbed olive and brown marabou fibers. The next move is to tie off between the chenille eyes and at the eye of the hook. 7) It is important to have a good quality pair of curved scissors as the tail needs be cut to shape of a dragon abdomen and also this helps further to avoid tail wrap. |
|
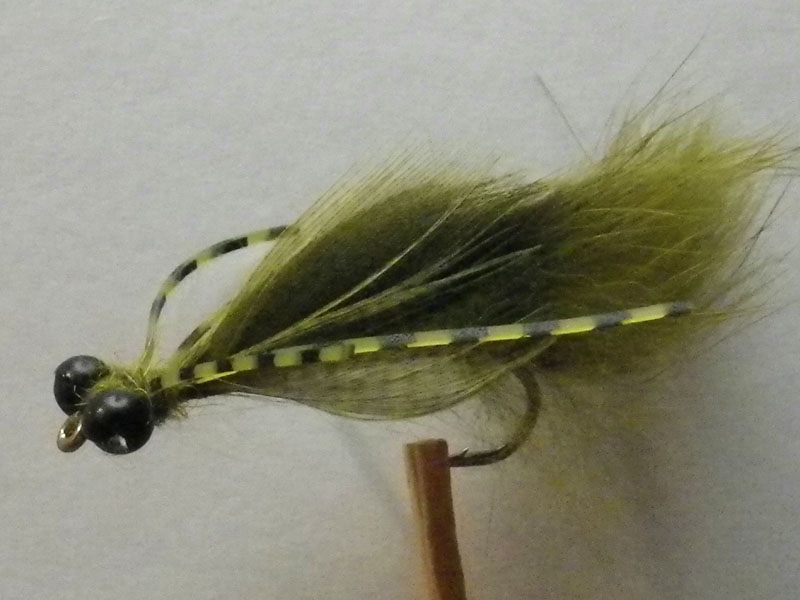
Papa Roach
Papa Roach |
|
By Marco Breschi |
|
 |
|
Materials |
|
| Hook | 3X shank-wide gape (wet/nymph type) in #6 or #8 |
| Thread | Olive or brown 0/6 |
| Tail | Zonker strip (part of the body) |
| Body | Olive or brown zonker strip (preferably short fibred) |
| Eyes | Large black, round plastic beads |
| Wing case | Olive or brown Mallard breast feathers (2 on each side) |
| Thorax/head | Olive/brown dubbing mixed with fur from zonker |
| Legs | Round rubber in olive or brown |
Tying Instructions |
|
| 1) Lay a thread foundation to the gape of the hook and coat with a layer of head cement (Sally Hanson’s).
2) Tie in the eyes just behind the eye of the hook leaving sufficient space for tying off. 3) Select a suitable section of Zonker strip and measure off against the hook shank allowing only 3-4 mm skin to extend past the hook bend. This will help reduce/eliminate tail wrap. The rabbit hair will give the fly its length and shape. 4) Spread the hair fibers and tie in Zonker strip at the bend of the hook ensuring that only 3-4 mm skin extends past the hook bend. 5) Advance the thread forward to at least 4/5 of the way along the shank, spread the hair fibers and tie in the Zonker strip. Advance the thread further to within 4-5 mm of the eyes and complete the tie in of the Zonker strip. Apply some head cement to ensure the strip does not come undone when a fish is caught. This gap is necessary for you to tie in the wing case, the rubber legs and to dub the neck area. 6) Select 4 Mallard Breast feathers of approximately the same size and strip off only the bottom 2/3 of the feather, leaving the tip full. This ensures that no feather fibers extend below the hook shank. 7) Tie in 2 feathers on each side behind the eyes ensuring that the feathers meet up on top of the Zonker strip tent-wing style. The feathers should flank the Zonker strip along 1/3 of its length. This helps to contain the movement of the Zonker strip and to give the fly the correct shape. 8) Tie in a length of round rubber leg in the space between the eyes and the end of the Zonker strip and adjust/set to position the legs slanting forwards and backwards. Repeat this step on the other side of the hook shank. 9) Dub the neck area, separating the legs and between the eyes. Whip finish and tease out the dubbing so as to create a slight halo around the abdomen. 10) Nip out some of the long base fibers of the Zonker Strip to form a bluntish tail and adjust the length of the abdomen/thorax to 4/5 of total fly length. Rather have a longer abdomen than a too short one. |
|
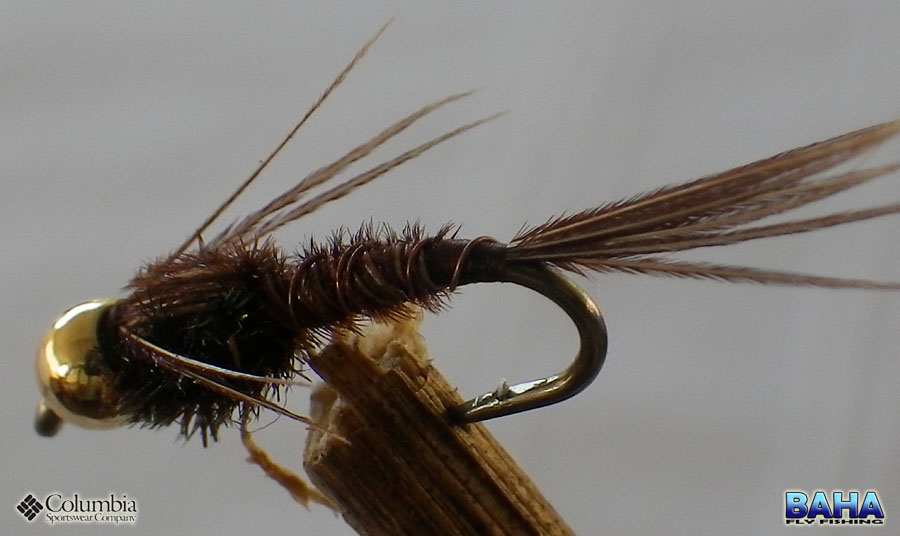
The PTN
The PTN (Pheasant Tailed Nymph) |
|
By Warren Prior |
|
 |
|
Materials |
|
| Hook | #12 – #16 nymph hook (a #14 was used in the demo fly) |
| Thread | Any fine brown thread – The colour must match the colour of the pheasant tail |
| Thorax | Peacock herl (or orange dubbing to tie an orange hot spot) |
| Tail, Body & Wing Casing | Pheasant tail |
| Ribbing | Copper wire |
| Head | An appropriately sized copper bead |
Tying Instructions |
|
| 1) Begin by dropping a bead (I used copped) onto the hook and moving it up to the eye. The bead is important to weight the fly so choose an appropriate bead. Tungsten for example is great for fast moving and deeper waters. Other colour beads can also be experimented with.
2) Dress the hook shank with your chosen thread to provide a solid base to tie the materials onto. Then wind the thread down to the bend of the hook and tie a piece of copper wire which will be used to rib the body and will provide additional strength to the fly. 3) Next tie in around 4 – 6 strands of pheasant tail to create the tail of the fly. Generally the tail should be around the length of the hook shank. 4) Rather than trimming off the pheasant tail (and wasting it) we will use it to form the abdomen. Do so by winding the cotton up the hook to the where you wish the thorax to end (roughly a third of the way down the hook shank from the eye). Now wind the ends of the pheasant tail up to the cotton and tie them off. You can now trim off the remainder. 5) Counter wrap the copper wire over the thorax thus securely trapping it. Tie off the copper wire and trim off any excess. Pheasant tail is a relatively brittle material and often breaks when fighting a fish. This ribbing will therefore give the fly some extra life. Note: Counter wrapping means to wrap in the opposite direction to the material under it. This traps the material more efficiently than wrapping in the same direction. 6) Tie in another 6 strands of pheasant tail by the but, making sure they point towards the tail of the fly. These will be folded over the thorax and will eventually form the wing case and legs. 7) Tie in a few strands of peacock herl and build up a well shaped thorax using them. It should be roughly a third of the length of the fly. Tie these off behind the bead. Note: Dubbing in a thorax instead of using peacock herl provides some great alternative nymphs. If often dub in an orange thorax to tie a form of the orange hot spot for yellowfish. 8) Fold the strands of pheasant tail over the thorax and secure them behind the bead to form the wing casing. 9) At this point you can either cut off the ends of the pheasant tail, or split the strands into 2 groups and fold them down the sides of the fly to form legs. 10) Tie off the fly. You are done. |
|
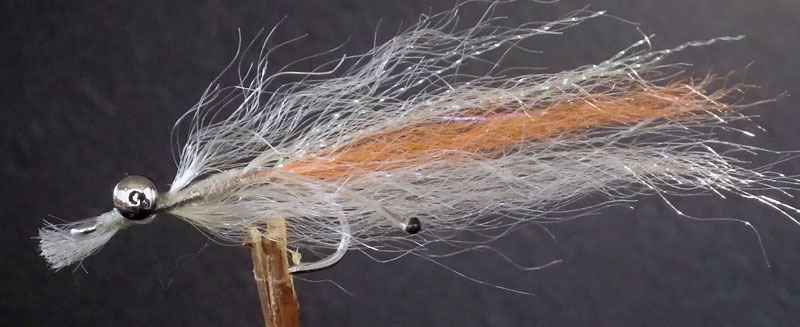
The Bay Shrimp
The Bay Shrimp |
|
By Christian Calliontzis |
|
 |
|
Materials |
|
| Hook | Mustad ultra sharp size 6 |
| Thread | 5x tippet or any clear thread |
| Tail | Orange SF blend |
| Body | Shrimp SF blend, mother of pearl flash |
| Eyes | 4mm black dumbell eyes, 55 pound mono |
Tying Instructions |
|
| 1) Add the eyes about 4mm behind the eye of the hook and add a short piece of the orange attractant at the bend the hook as well as a few strands of mother of pearl.
2) Burn the mono so that you get a well-rounded black eye. Pinch the mono flat with pliers and bend slightly then tie facing downwards (Assuming the hook is in the normal position). 3) Tie in a shorter piece of the shrimp body on top and a slightly longer piece below the shorter piece. Remember to keep the fly spars. 4) Back on top add another piece of the shrimp material, tying the thread just behind the eyes. With this piece you must fold over the dumbbell eyes and tie off near the hook eye. 5) Add the final piece of shrimp material. This is the longest and most important part as it is what provides the length and most of the bulk. Tie in as you did with the first fly and again bring the excess forward but instead of trimming the piece off leave a short little piece, almost like a lip on a rapala. Super glue for added durability.
|
|
Peter Brigg’s Wolf Spider
Peter Brigg’s Wolf Spider |
|
By Peter Brigg |
|
 |
|
Materials |
|
| Hook | Grip 11011 BL #14 and #16 |
| Thread | Grip 11011 BL #14 and #16 |
| Body | Foam strip Approximately 3 to 4mm wide to suits fly size |
| Post | Antron or Z Lon |
| Hackle | Sparse ginger from a Cock Cape with fairly long fibers. |
Tying Instructions |
|
| 1) Wrap hook shank with tying thread and attach foam strip at the bend of the hook opposite the barb.
2) You can add under body of peacock herl or dubbing of choice and then pull foam over and secure at a point approximately one third of the hook shank behind the eye. 3) Add post and hackle feather at the tie off point in 2 above. 4) Add legs behind the parachute post (important). First back legs in pairs of Pheasant tail fibers on either side and followed by front legs in the same way. Tie these loosely so that you can pull the butt ends to create the desired leg length for the size of fly, but keep them fairly long. Add a drop of super glue and take an extra couple of wraps to secure the legs before trimming the butt ends 5) Wrap the parachute hackle feather around post with about 4 wraps and tie off, before finally trimming post to desired length. |
|
DFT Members Teaching The Tendele Fly Fishers
Several members of the Durban Fly Tyers spent the weekend at Kamberg teaching the Tendele Fly Fishers the rudiments of fly tying. Tendele Fly Fishers is a community outreach project run by the KZN Fly Fishing Association (KZNFFA) and spearheaded on the ground by Richard Khumalo.
What made the event extra special was Jay Smit’s (J Vice) donation of 10 Tendele Training Vices. This is a new, inexpensive fly tying vice dreamed up by Jay Smit for the occasion. It is very good indeed.
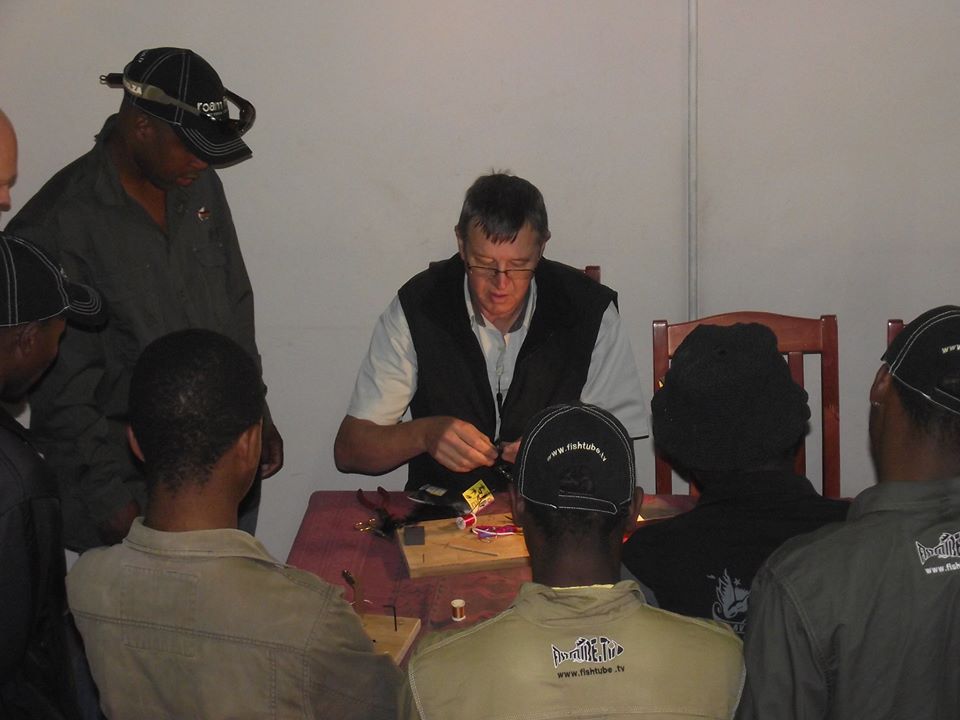
Jay teaching the Tendele community
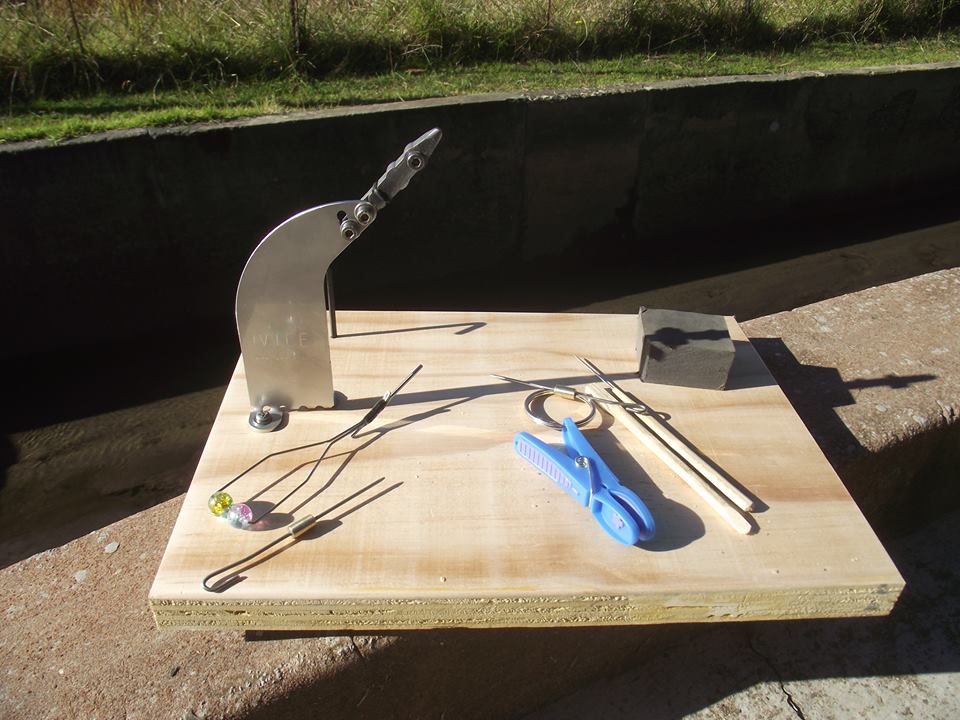
The Tendele Training Vice by Jay Smit of Jvice
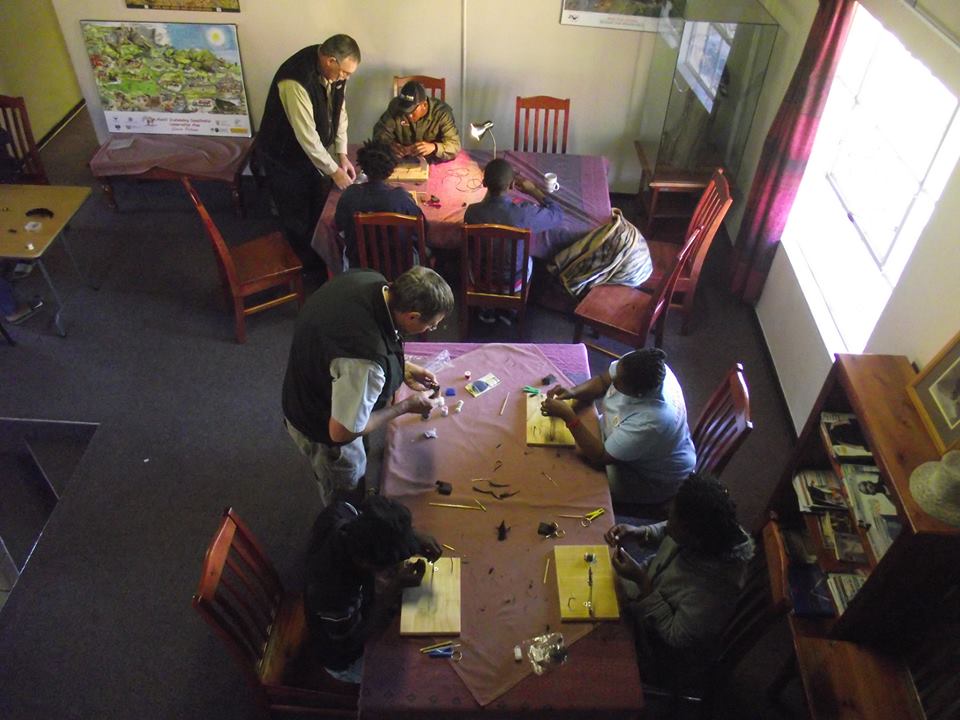
DFT members teaching fly tying to Tendele Fly Fishing
Brush Fly
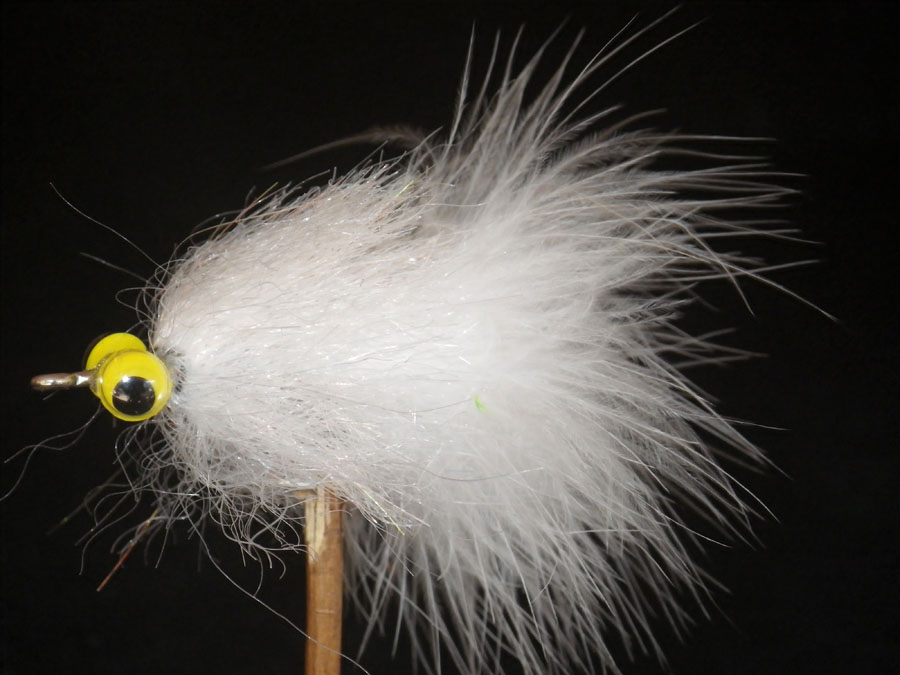
Brush Fly |
|
By Nick Nortje |
|
 |
|
Materials |
|
| Hook | 1/0 stainless steel |
| Thread | White |
| Tail | White marabou |
| Body | White/pearl flash |
| Eyes | Yellow dolls eye |
Tying Instructions |
|
| 1) Buy a brush maker if you have not bought Jay’s awesome new brush maker.
2) Start the cotton about half way down the hook ending just after the barb. 3) Tie in a generous amount of marabou and make a half hitch. 4) Place the brush on the top of the hook going forward and tie it in. Add a drop of super glue for some extra insurance. Pull all the fibres of the brush backwards. 5) Rotate the hook while wrapping the brush around the shank till about ¾ of the way up not forgetting to tease out the fibres using a comb or the fly will not have the required profile. 6) Tie off the brush and build a small cone. Using knot sense or clear epoxy glue your dolls eyes on and allow to dry. You can build up a head should you want extra weight, but again personal preference. Don’t forget to tease out the brush for that awesome action in the water. |
|
Cape Vidal
Friday saw 6 DFT fly fishermen climb out of bed at 4am in pouring rain and howling wind to make the 320km drive to Cape Vidal to lay claim to the kingfish that frequent the area at this time of year. The weather reports were not good but we were confident it wouldn’t be as bad as they made it out to be.
I picked up Steve and headed to the first rendezvous point to meet the rest of the gang and travel up in convoy. At about 5:30 we were all together; Steve, Neill, Bruce, Joe, Graham and I. And after a quick cup of coffee we were on our way.
This trip seemed to be missing something. There was no mocking and no bullshitting, and then it dawned on me, Warren had opted to stay at home in fear of missing the birth of his child that was due later in the month.
We arrived at the Whipme in St. Lucia where our fears were confirmed. The wind was howling, close to 40km/h, and it was pouring with rain. Nevertheless we scoffed down our breakfasts and headed to the beach.
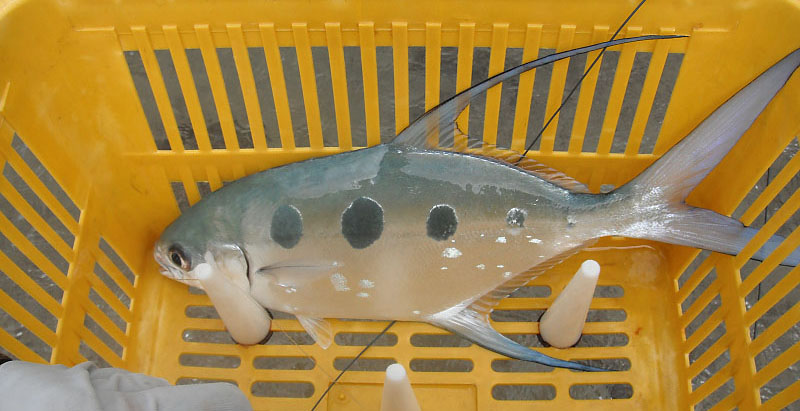
Largespot Pompano
Once on the beach we knew that conditions for fly fishing were far from ideal. I kitted up my 5wt and 9wt and made my way out onto the reef whilst Neill, Joe and Graham walked north on the beach in search of holes. After a few attempts at casting my 5wt straight into the wind I decided to change tactics and use the T-50 9wt. What a machine! I was now effortlessly casting full lines with minimum effort. Bruce then joined me at the end of the reef were we both slogged the water while Steve worked the water up along the reef’s drop-off.
Things were rather dismal with only a kingie, needle scale queenfish, stone bream and a handful of moonies and wavies coming out for the session. We booked in at around lunch time, had a few beers, discussed tactics and then headed back down to fish the incoming tide for the late afternoon. By now the wind had dropped to a gale and it was now slightly fishable.
We were all huddled in the corner of the bay with the wind behind us. The water was looked like a washing machine with the incoming tide meeting the intense side wash and creating prime kingie territory. A few moments later the water was boiling as bait fish scrambled to get away from the predators beneath. We were throwing all sorts of flies into the mayhem but sadly to no avail.
Finally, with the full tide, things calmed down and everyone left except for Bruce and I who stayed to fish into the evening. By this time the moonies had moved into the bay for protection, which was good fun on my Xplorer Guide II 5wt. Finally, at about 18:30, we could hear Charles beckoning and called it a day.
That evening saw us braaiing in the rain where Steve made a machine of a fire to combat the amount of water falling from the sky. We had a relaxed evening (with copious amounts of rum and whiskey) while talking large amounts of bullshit.
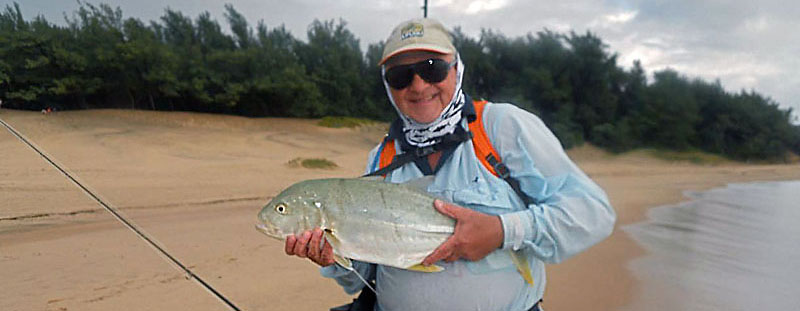
Steve Brookes with an awesome brassy kingfish
Saturday morning was slightly better in that there was no longer any rain, but the wind still was blowing. Steve got up before sunrise and made his way onto the beach. This seemed to be the right move. The bait fish again had the water boiling. Steve was fishing ideal “big fish” flies on his 12wt and it paid off! He got into three decent sized kingies, one of which smashed him off on the bricks. Thankfully two were landed and photographed before being released to fight another day.
The rest of the gang slowly appeared from the night before (complete with packed lunches) with Bruce heading South and Neill and Joe going north. Graham and I meanwhile waited for the water to drop so we could head out onto the reef again.
After producing nothing I too walked north fishing the very limited holes along the way. Again only (damn) moonies were coming out and I was yet to catch a wave garrick. Steve however, smiling ear to ear, went back to the cottage to catch up on a few winks.
By lunch time I had thrown in the towel and returned to the cottage for a quick bite and to tie up some flies for the following morning. Bruce, Neill and Joe returned a little later with a very bleak looking Bruce. When asked what’s wrong he showed us half a fly rod – apparently the other half was in the surf somewhere along the kilometers of north coast.
Fly boxes were restocked, tippets changed and we were off for the evening session. After hearing of Steve’s buses we were all in high hopes. Big flies were the order of the day. Unfortunately the bait fisherman pulled in by the dozens after seeing what was lurking under the surf. This made it harder as most of them would cast out and then sit on the beach boozing it up while their lines would be washed up onto the beach by the strong side wash. This was rather annoying and after voicing our anger they sorted them out so we could all fish.
Things had gone quiet again and I decided to take a few pics of the gents in action. I must say watching Steve Brooks in action is truly a majestic site. He effortlessly casts his 12wt and is best described as art in motion. I’m sure we could all learn something from his technique.
Again, as the sun fell behind the dunes, the moonies plagued us. They were literally cast for cast, shot for shot. We continued to fish until there was no light and then headed home for an ice cold beer.
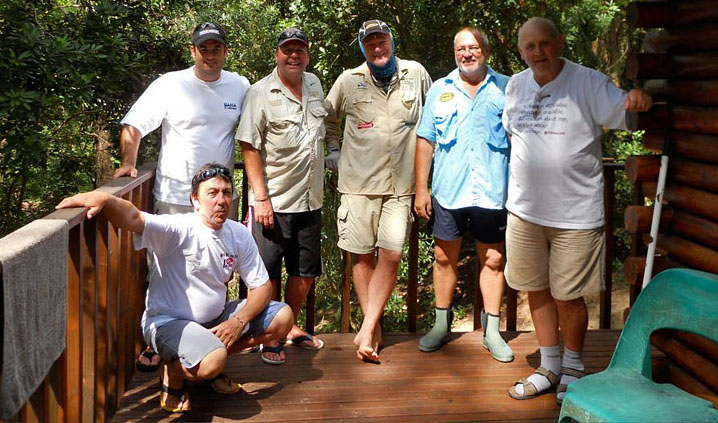
The boys
Neill and Joe had taken it upon themselves to get the fire going while the rest of us showered and got meat ready. We were lucky enough that the bush pigs came to our chalet first. In fact Joe was over the moon that they were so close. I started luring them closer with bread until they were about 3 meters from us when, without Joe noticing, I dropped a slice of bread at his feet. Well that was him! As the pig charged forward to get his treat Joe dropped a coil and hid behind Neill who was in hysterics.
After a delicious meal and copious amount of rum we tucked in for an early morning start.
Steve again was up at sparrows and was on his way to the beach before any of us had risen. By the time we were on the beach, just after sunrise, the ski boats had launched and ruined any chance of getting into the bigger fish. Again a few wavies came out, as well as a couple of moonies and a juvenile kingie.
All in all it was a fantastic weekend away with like-minded people. A total of over 100 fish came out between the 6 of us and for once we were not robbed by the resident monkies that have become a problem over the years. I’m not sure if the Parks Board have started culling the pests but whatever they have done it seems to have worked.
The next Vidal trip will be towards September this year, so keep an ear to the ground!
Till next time. Tight lines!
Another Inanda Outing
With Inanda Dam so close to our club it’s amazing that we don’t pay it more frequent visits. Perhaps it’s the bad rep which bass have with fly fisherman. Or perhaps it’s the rumor of crocodiles. Either way we decided to open a few peoples eye’s to the opportunities on our doorstep and organised a morning’s outing.
After our previous disaster we aimed to be at the gate at 6am, only to discover that it now opens at 5am as we had previously thought. None the less we quickly kitted up and were soon joined by a few other fisherman.
As is the norm for bass we mostly fished the surface . On my second cast I missed a small fish. A few cast later I missed another. Since they looked to be small I downsized to a small popper and immediately got into a few small bass.
Nick was also fishing the surface but he was missing a lot of fish due to the size of his flipper. I guess he was after the big boys. Ever the optimist.
Gavin on the other hand opted to fish sub surface and also picked up a few small bass, although the surface option certainly seemed to be a lot more productive.
On a whole the day was great fun. We landed in the region of 30 bass and loved every minute of it. We may not have hooked into anything big, but we had an awesome morning none the less.
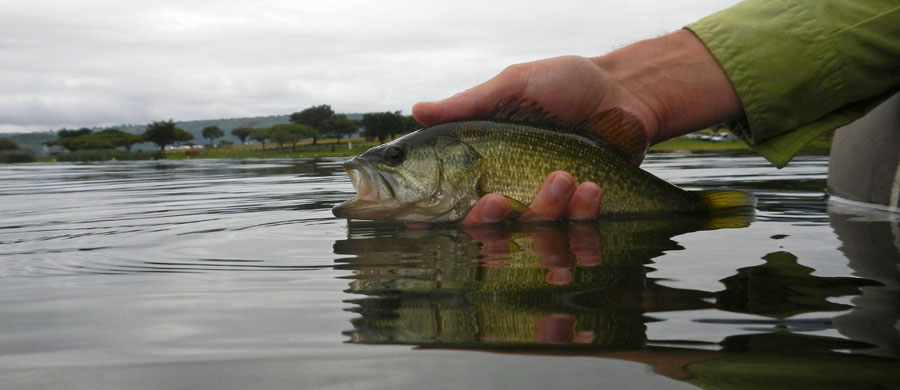
Largemouth Bass Release
 D5 Creation