
Archives
now browsing by author
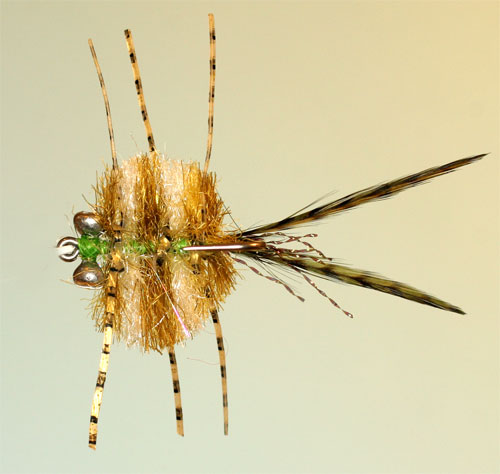
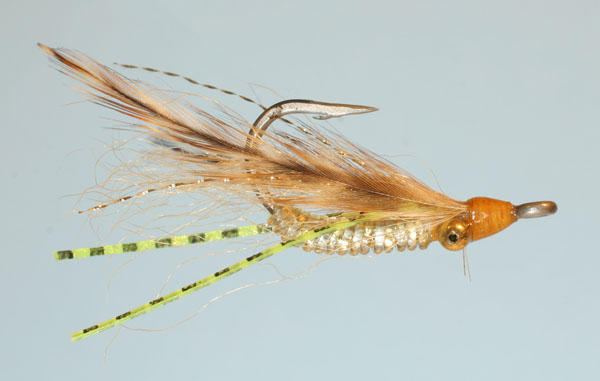
Crab Pattern
Crab Pattern |
|
|
|
|
Materials |
|
| Hook | SS Long Shank #3 to #6 |
| Thread | 3/0 or finer colour to match |
| Head | Dumbbell Eyes |
| Pincers | Hen Hackle and Flash |
| Body | Yarn Colour to match natural Tan to Brown Olive |
| Legs | Rubber Legs |
Tying Instructions |
|
| 1) Dress shank of hook and tie in Dumbbell eyes behind the eye.
2) Tie in a small bunch of flash above the barb. 3) Tie in a pair of hen hackles curving outward to simulate the pincers. 4)Reverse the hook in the vice and starting below the barb tie in short lengths of yarn at 90 deg to the shank using figure of 8 method. 5) Repeat with alternate shade to create a striped body. Use 2 of the primary colour to one for the stripe. 6) Repeat this process right up to the dumbbell eyes. 7) Trim the yarn to form a crab shaped body. 8) Tie in the rubber legs using a simple half hitch and trim the legs to length. 9)A very small amount of super glue can be used on the leg knots as well as the dumbbell eyes. 10)This fly can be fished in the surf zone with as sinking line as well as letting it drift in deeper water. |
|
Variation |
|
|
|
|
Traditional Soft Hackle
Traditional Soft Hackle |
|
|
|
|
Materials |
|
| Hook | Wet Fly #10 to #18 |
| Thread | 6/0 or finer (colour of choice) |
| Rib | Copper wire |
| Body | Natural Dubbing Colour of choice |
| Wing | Partridge Pheasant or hen Hackle |
Tying Instructions |
|
| 1) Dress shank down to above the barb.
2) Tie in the ribbing. 3) Dub the thread forming a tapered noodle. Note: When viewing from the top the dubbing should be twisted in a clockwise direction to prevent unwinding as it is wrapped around the hook shank. (reverse for Left Handed) 4) Wrap the dubbing forward forming a tapered body. Leave enough room for the hackle and head. 5) Wrap the Ribbing forward through the body in the opposite direction. Tie off. 6) Prepare the feather by clamping the tip in hackle pliers. Then (with the small finger of the right hand in the hackle pliers loop and the left hand holding the feather taught) with the shiny side up using the thumb and fore finger of the right hand stroke the fibres down and back. Repeat the process until the fibres on both side of the quill are against each other. 7) Remove hackle pliers from the feather and tie the prepared feather in by the tip with fibres facing back and the quill vertical. 8) Now wrap the feather in 3 or 4 close wound wraps forward toward the hook eye and tie off. 9) Form a neat thread head, whip finish and varnish. |
|
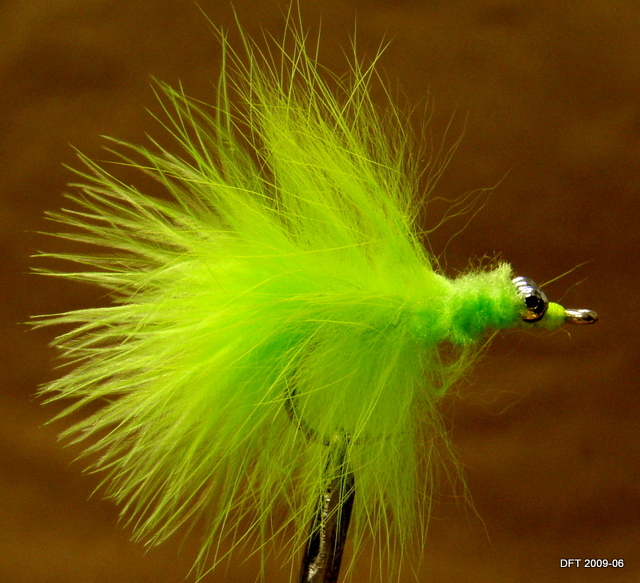
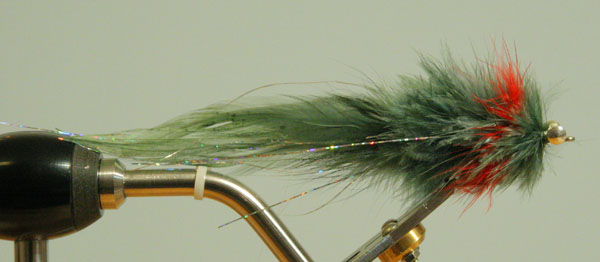
Backwater Bass Bent Back
Backwater Bass Bent Back |
|
|
|
|
Materials |
|
| Hook | Stinger 2/0 or bigger |
| Thread | Red or Olive 3/0 |
| Flash | Of Choice |
| Body | Chartreuse Cactus Chenille |
| Tail | Olive Buck tail and Peacock Hurl |
| Head | Red and Olive Hackle |
Tying Instructions |
|
| 1) Prepare the hook by putting in a slight bend about 1/3 from eye. Bend just enough to get the hook to swim point up.
2) Starting right from within the bend of the hook wrap the cactus chenille forward to the bend and tie off. 3) Tie in a clump of buck tail on top of the shank at the bend. (hook point up). This must extend beyond the hook and also acts as a weed guard by protecting the hook point. 4) Tie in some flash above the buck tail. This can be slightly longer than the buck tail.. 5) Top of with 5 or 6 peacock hurls. 6) Just ahead of the Buck tail tie in a red hackle buy the base, curved side down and wrap forward in tight turns forming a neat collar. 7) Just in front of the red repeat with an Olive hackle. 8) Form a neat thread head, whip finish and cement. |
|
Variation |
|
|
|
|
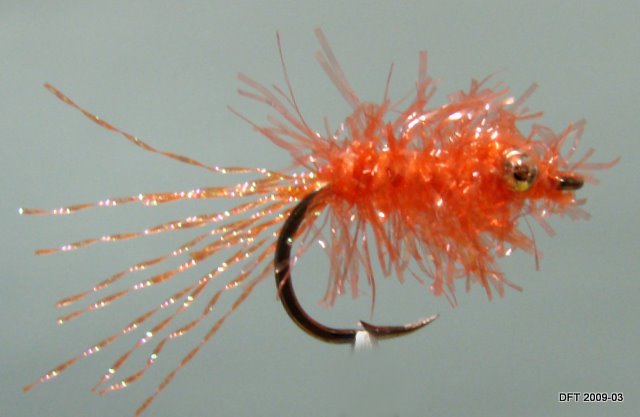
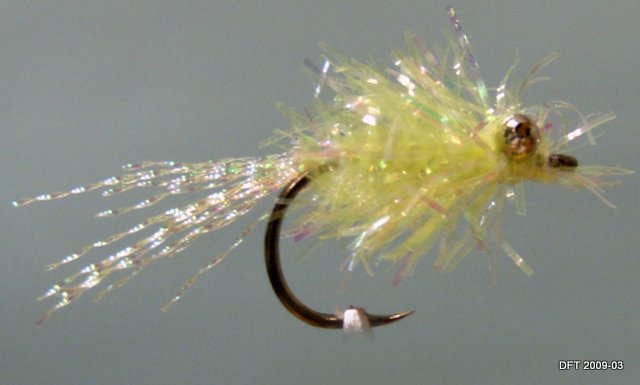
Surf Puff
Surf Puff |
|
|
|
|
Materials |
|
| Hook | Daiichi DH55 #2 to #4 |
| Thread | 3/0 To match Cactus Chenille |
| Eyes | Bead chain |
| Body | Cactus Chenille Burnt Orange, Pearl, Chartreuse etc. |
| Tail | Flash to match Cactus chenille |
Tying Instructions |
|
| 1) Dress shank of hook and tie in bead chain eyes.
2) Tie in the flash Above the barb. 3) At the same point tie in the cactus chenille. 4) Wrap the chenille forward to the eyes. 5) Tie off and form a neat thread head. |
|
Variation |
|
|
|
|
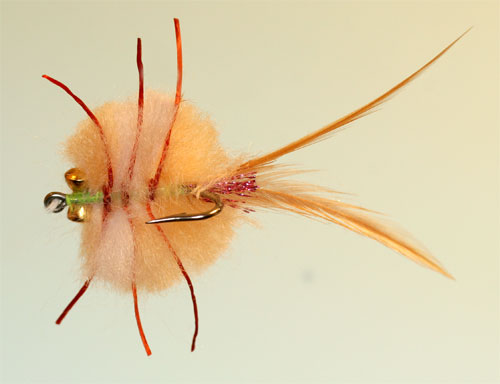
Tarpon Toad
Tarpon Toad |
|
|
|
|
Materials |
|
| Hook | Gamagatsu SC15 1/0-2/0 |
| Thread | 3/0 or finer colour to match |
| Head | Bead Chain |
| Tail | Marabou |
| Body | Zonker Strip |
| Front Body | Wool |
Tying Instructions |
|
| 1) Dress shank of hook and tie in Bead Chain behind the hook eye.
2) Tie in a bunch marabou above the barb. 3) Tie in the Zonker in front of the marabou and give 2 wraps forward toward the hook eye and tie off. Make sure the fibres are not trapped. 4) Tie in short lengths of yarn at 90 deg to the shank using figure of 8 method. 5) Repeat this process right up to the bead chain eyes. 6) Trim the yarn evenly to shape the body. 7) Form a neat thread head in front of the bead chain and whip finish. 8) This fly can be fished in the surf zone with as sinking line as well as letting it drift in deeper water. |
|
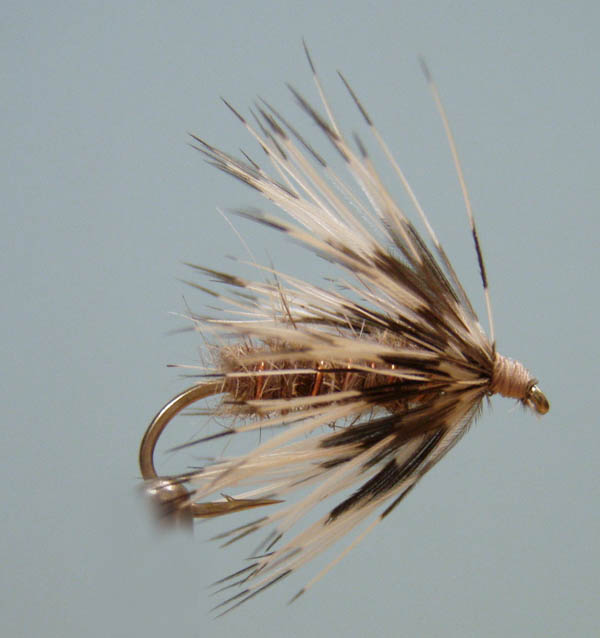
Elk Hair Caddis Variant
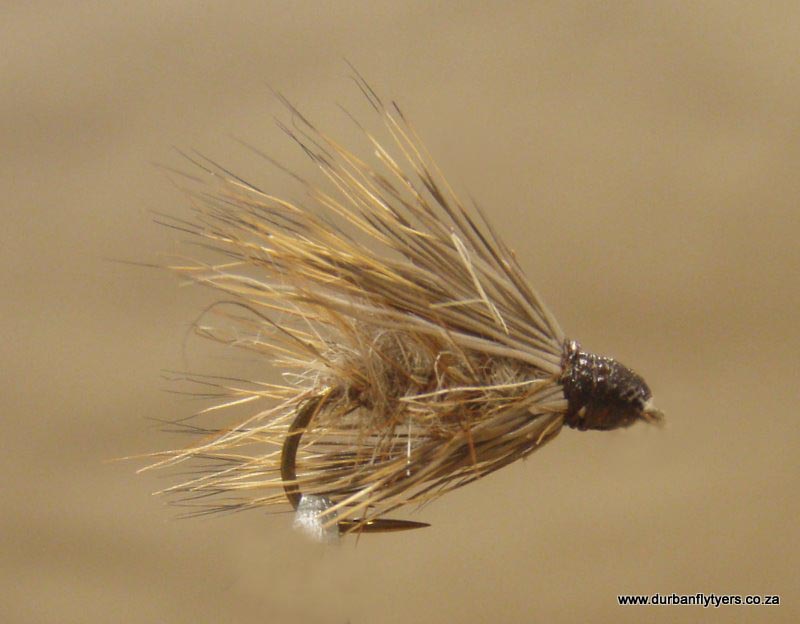
Elk Hair Caddis Variant |
|
This is a dry fly favoured by trout fisherman in small streams |
|
|
|
|
Materials |
|
| Hook | Dry Fly 2x # 12 or # 14 |
| Thread | 6/0 Thread – Brown |
| Body | Natural Rabbit Grey |
| Hackle | Orange Hen |
| Wing | Fine Elk Hair |
Tying Instructions |
|
| Tie in the thread and dress hook down to above the barb.
Take the hackle and stroke from tip to base to get the barbs ar right angles to stem. Tie in the hackle base end above the barb with the tip facing back. Spin a slender dubbing noodle using the rabbit then wrap forward to form the body. Tie off behind the eye leaving room for the head of the fly. Wrap the hackle forward in even turns to the same point and tie off. Take a bunch of elk hair (size to match the hook). Pull out the fluff at the base. Stack in a stacker to get the tips even. Tie in the wing behind the hook eye. The wing should be slightly longer than the hook. Cuta way all the elk hair that extends beyond the hook eye and the form a thread head over the deer hair. |
|
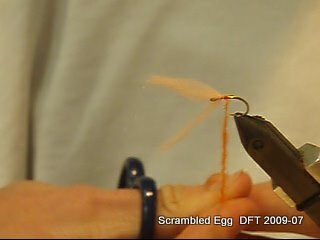
The Scrambled Egg
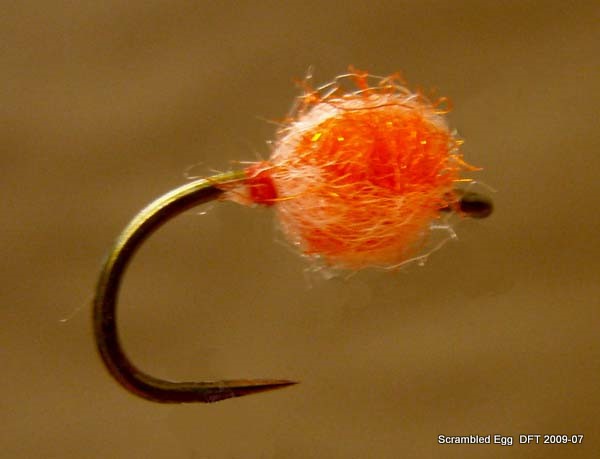
The Scrambled Egg |
|
A hybrid between a standard Crystal Dubbing Egg and Jim Pettis’s Unreal Egg |
|
|
|
|
Materials |
|
| Hook | Tiemco 2488H # 12 or # 14 |
| Thread | 6/0 Uni Thread – FL. Orange or Red |
| Under Body | Harline Dubbin, Inc. STS Trilobal Dub – Hot Orange |
| Overbody (Cacoon) | Wapsi Egg Yarn – Salmon Pink or Light/Faded Pink |
Tying Instructions |
|
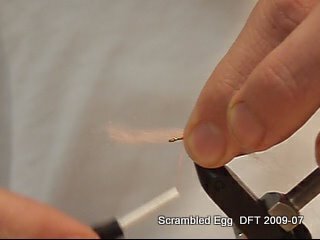
| Step One:Tie in the thread in the middle of the hook shank.
Take note, rather use the least amount of Egg Yarn as you are using it to create a translucent ‘cocoon’. Cut a 8cm section of Egg Yarn – this is then split in the length as you will only be using half of the original diameter of egg yarn to tie this fly.
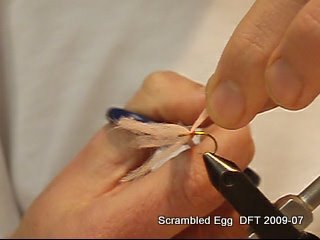
This section is then split lengthwise once more, keep the other section as this will be used in the next step. (You should be left with two ¼ pieces of Egg Yarn)
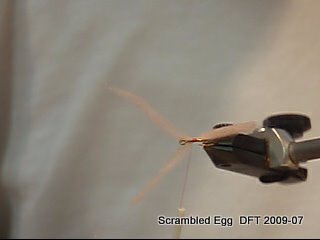
Tie this section in on top of the shank and secure with two turns of thread; the section you will be using must be facing toward the eye of the hook as you will eventually tie off at the back of the hook (closer to the bend)
Now split this tied in Section and then using your thumb and index finger, turn this split section on the shank so that it is now located at the bottom of the shank. Viewed from the top is should look like a Y. Step Two: Tie in the Section of egg yarn that was kept aside in step one on top and middle of the shank. Now take a couple of turns toward the eye of the hook to secure both sections of Egg Yarn ( the newly tied in section and that piece located on the bottom of the shank) The finished fly must be located in the middle of the shank so be sure to leave enough space behind the eye.
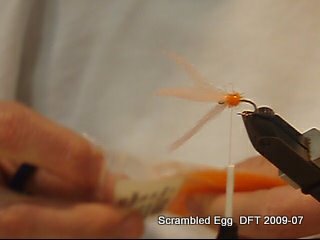
At this point you should have three ‘pieces’ of egg yarn sticking out towards the front of the hook over the eye. Step Three: Spin the dubbing onto the thread and form a round underbody the size of the actual egg.
Start in the middle of the shank, cover those wraps that secure the egg yarn and end off towards the back of the hook. Your thread should be located behind the egg body at this point as this is where you will tie in the Egg Yarn. Optional : Cut away any strands of dubbing that protrude past the actual body of the fly. Step Four: You now take each piece of each yarn individually and for the ‘cocoon’ around the dubbed body. Start with the section you tied in first and that is located on the top of the shank.
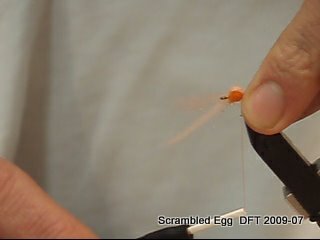
Pull it over the top and to the back of the dubbed body covering the top half of the body and while trapping it with two loose turns of thread, leave some slack in the yarn as to form a bubble in the material. You can also use a needle to ‘lift’ the Egg Yarn off of the dubbed body as to achieve the desired effect. Now repeat this step for the other two pieces of yarn covering the bottom half of the body.
Making sure that the egg yarn covers 90% of the body in a translucent ‘cocoon’, whip finnish and cover thread wraps with head cement.
|
|

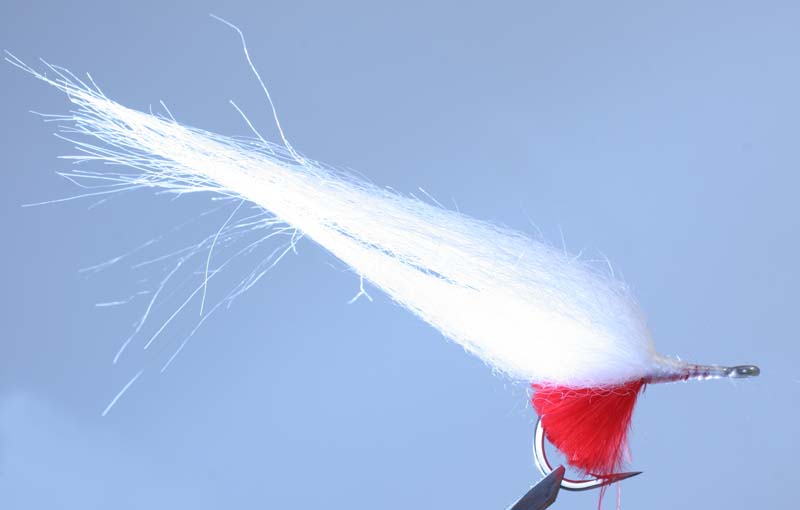
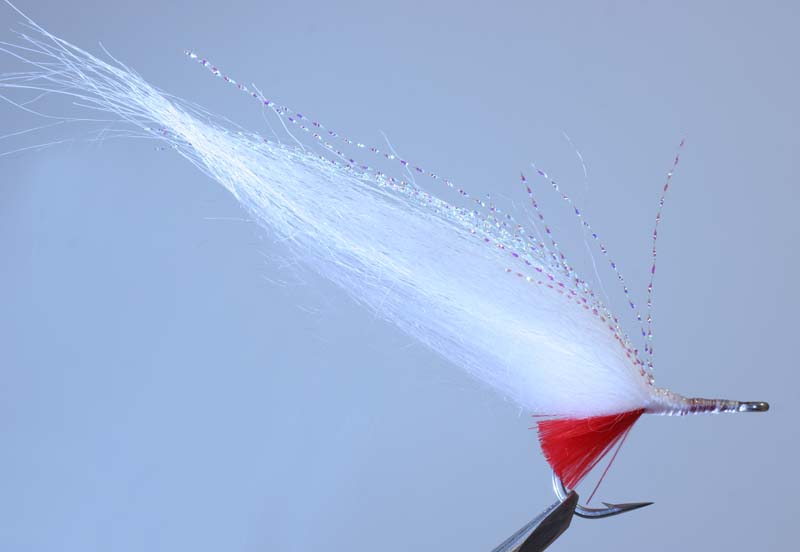
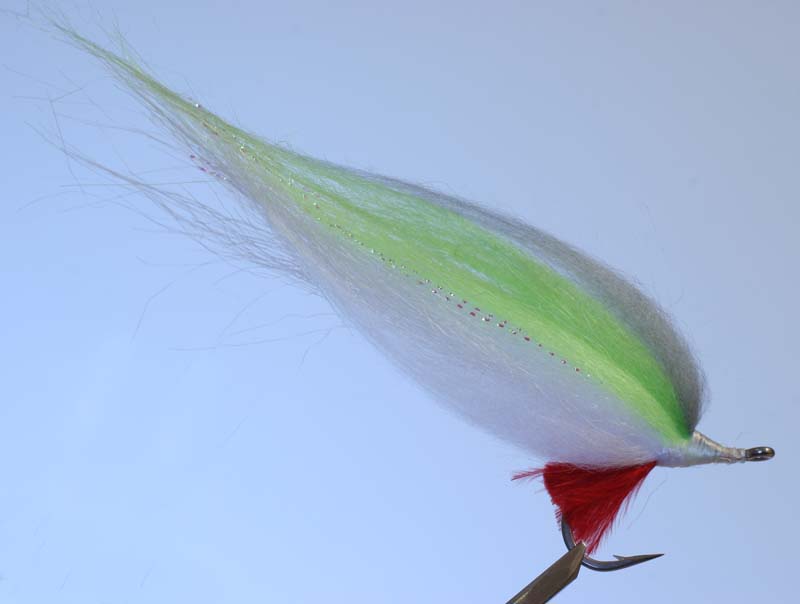
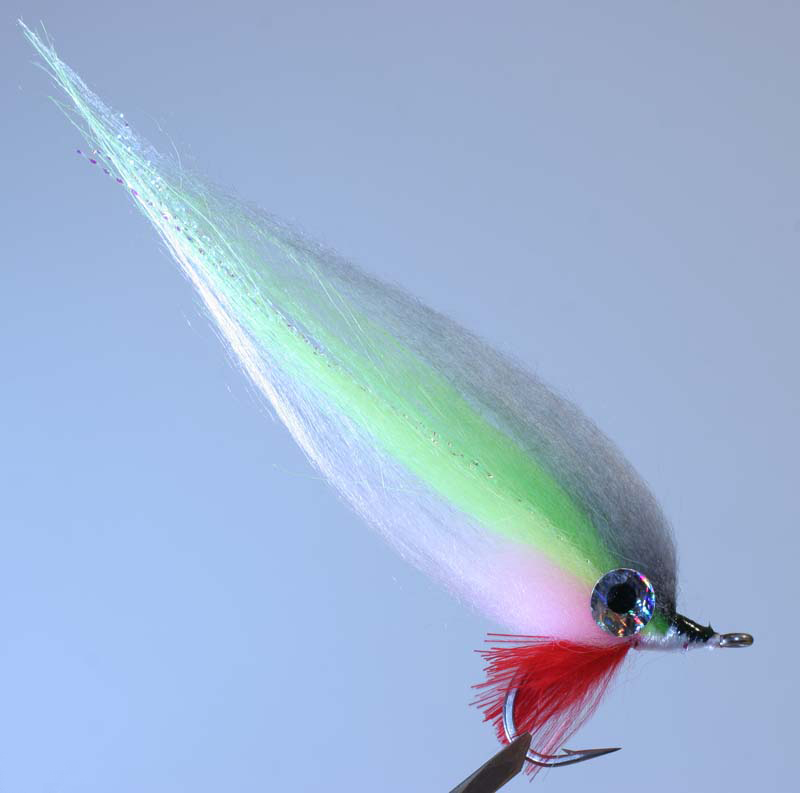
Hi Tie
Hi Tie |
|
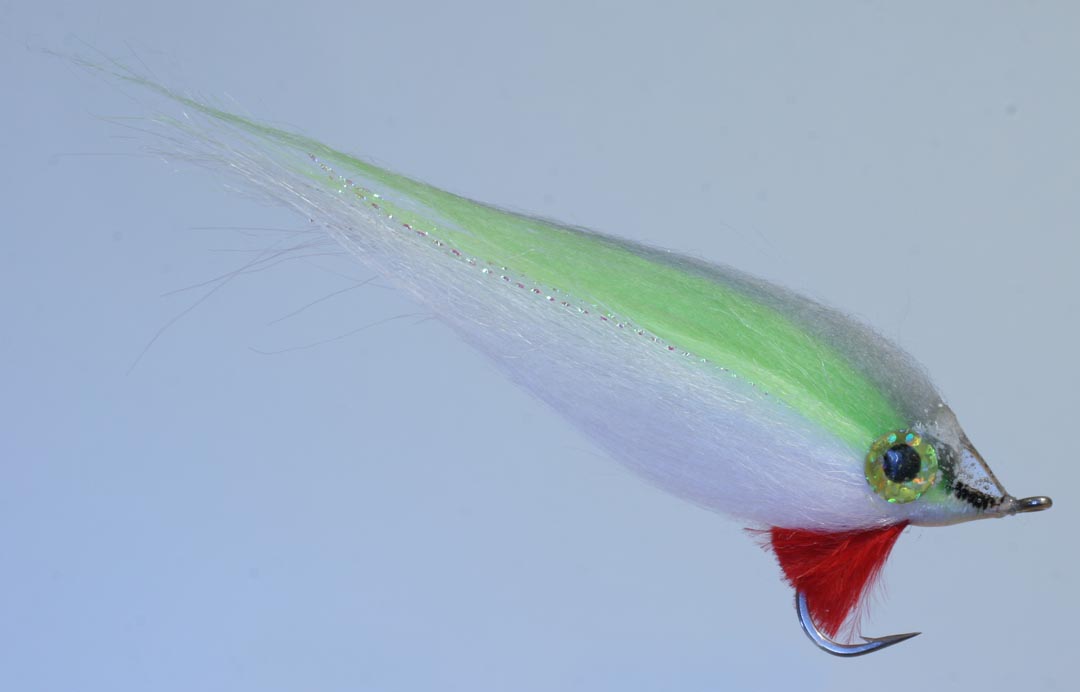
A Bait fish imitation |
|
|
|
|
Materials |
|
| Hook | SS Short Shank 1/0 to 2/0 |
| Body | Polar Fleece Colour of Choice |
| Head | Holographic Eye’s + Epoxy |
| Flash | To match |
Tying Instructions |
|
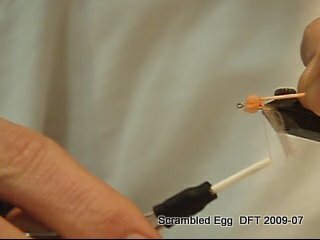
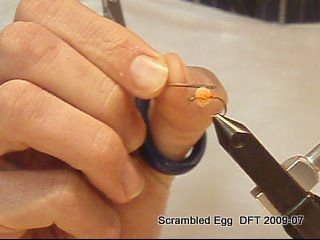
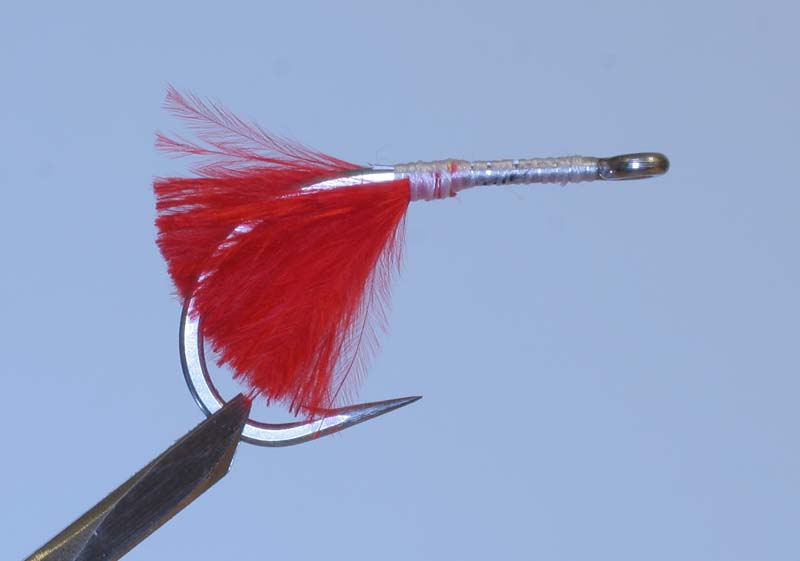
| 1) Tie in a small piece of red marabou (or Hot Pink Polar Fibre) under the hook above the barb.
2) Tie in a small bunch of Polar Fleece at the same point above the hook. Repeat with a second bunch on top but slightly forward.
3) Tie in a few strands of flash on top.
4) Then Tie in a small bunch of chartreuse followed by green and finally grey. (Experiment with various colour combinations.)
5) Comb the body to shape then using superglue glue eyes in place.
6) Finally when super glue is dry colour the head area with marker pen and build up some epoxy over the front of the eye and head.
|
|
Tying Tip |
|
| When cutting the Polar Fleece turn the material upside down and cut a small rectangle out by inserting a sharp pair of scissors just under the fabric weave as shown. Then hold the fibre and snip off the fabric weave. Comb out the excess fibres. | |
Variation |
|
|
|
|

Winged Charlie
Winged Charlie |
|
This is a variation of the Crazy Charlie. |
|
|
|
|
Materials |
|
| Hook | # 4 or 6 (stainless steel) |
| Thread | Personal preference |
| Wing | Calf tail / 2 Hen Hackle’s Rubber Legs flash 2/4 strands |
| Body | Flashabou / Gliss n Glow and monofilament 7 to 10 kg |
| Head | Bead chain / Dumbbell epoxy |
Tying Instructions |
|
| 1. Dress hook, tie in eyes behind hook eye allowing enough space to tie in the wing and flash.
2. Tie in a length of monofilament and two or three strands of flashabou or Gliss n Glo of a colour of your choice at the bend above the barb. 3. Wrap the flash forward to between eyes and secure. Wrap the monofilament over the flash in the same way and tie off. 4. Tie in the Calf Tail very sparse allowing it to extend past the bend by 5 to 10 mm. Tie in the flash on top of wing. Finally add the Hackle. 5. Form a neat head with the thread and epoxy. |
|
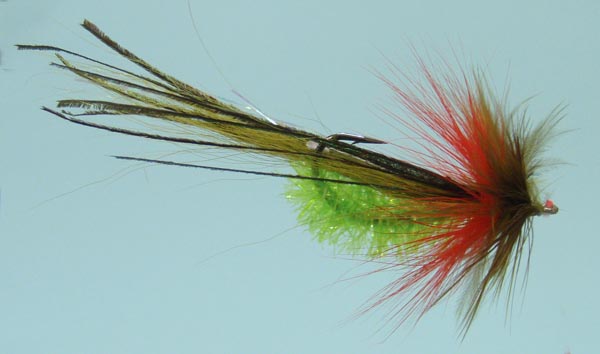
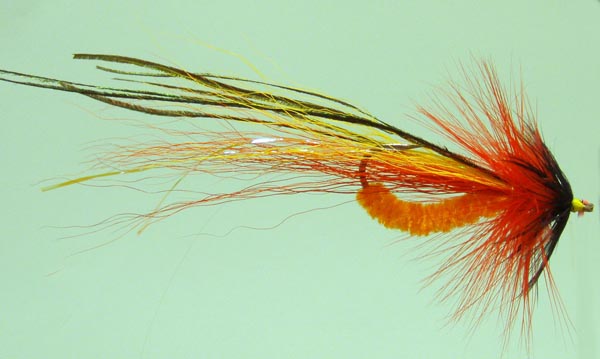
Whistler Variation
Whistler Variation |
|
Primarily designed for the surf the whistler is also very effective for bass. |
|
|
|
|
Materials |
|
| Eyes | Dumbbell (Traditional Bead Chain) |
| Hook | Salt Water 1/0 to 6/0 |
| Thread | To Match 3/0 |
| Flash | Of Choice |
| Tail & Body | Schlappen Hackle Feathers |
| Head | Epoxy |
Tying Instructions |
|
| 1) Select 6 suitable hackle feathers with some marabou at the base.
2) Using figure of 8 wraps tie in the dumbbell eye’s just behind the eye of the hook. 3) Tie in some stiff squirrel tail (or Buck tail) at the bend of the hook. This prevents the tail feathers from wrapping. 4) Tie in some flash above the squirrel tail. 5) Now tie in the hackle feathers 3 on either side of the hook. (They may be tied either inward or outward) Remember to leave some marabou on the feather as this creates a lot of movement. 6) Tie in a little more flash on either side of the tail feathers. 7) Working toward the eye of the hook tie in hackle feathers at the marabou end (do not remove all the marabou in the traditional way) and wrap forward in tight turns. 8) The hackle colours can be varied to get different effects. A red hackle just before the eyes simulates bleeding gills. Finish off with a darker hackle. 9) Whip finish and apply a little epoxy or head cement to the head and eyes. 10) A small amount of super glue can be applied to he hook shank before wrapping to make the fly more durable |
|
Fly Variation |
|
|
|
|

 D5 Creation