
Fly Tying
now browsing by category
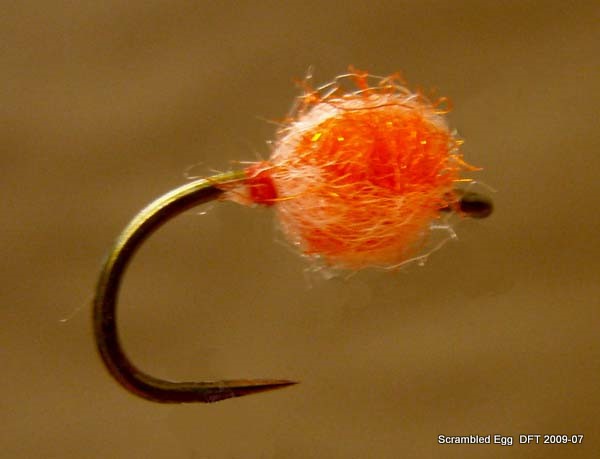
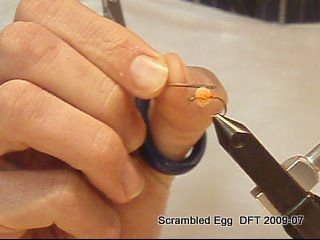
The Scrambled Egg
The Scrambled Egg |
|
A hybrid between a standard Crystal Dubbing Egg and Jim Pettis’s Unreal Egg |
|
|
|
|
Materials |
|
| Hook | Tiemco 2488H # 12 or # 14 |
| Thread | 6/0 Uni Thread – FL. Orange or Red |
| Under Body | Harline Dubbin, Inc. STS Trilobal Dub – Hot Orange |
| Overbody (Cacoon) | Wapsi Egg Yarn – Salmon Pink or Light/Faded Pink |
Tying Instructions |
|
| Step One:Tie in the thread in the middle of the hook shank.
Take note, rather use the least amount of Egg Yarn as you are using it to create a translucent ‘cocoon’. Cut a 8cm section of Egg Yarn – this is then split in the length as you will only be using half of the original diameter of egg yarn to tie this fly.
This section is then split lengthwise once more, keep the other section as this will be used in the next step. (You should be left with two ¼ pieces of Egg Yarn)
Tie this section in on top of the shank and secure with two turns of thread; the section you will be using must be facing toward the eye of the hook as you will eventually tie off at the back of the hook (closer to the bend)
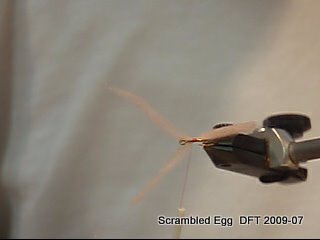
Now split this tied in Section and then using your thumb and index finger, turn this split section on the shank so that it is now located at the bottom of the shank. Viewed from the top is should look like a Y. Step Two: Tie in the Section of egg yarn that was kept aside in step one on top and middle of the shank. Now take a couple of turns toward the eye of the hook to secure both sections of Egg Yarn ( the newly tied in section and that piece located on the bottom of the shank) The finished fly must be located in the middle of the shank so be sure to leave enough space behind the eye.
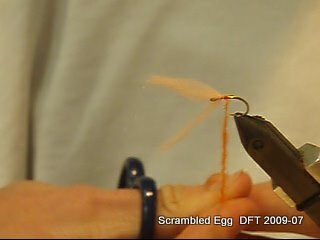
At this point you should have three ‘pieces’ of egg yarn sticking out towards the front of the hook over the eye. Step Three: Spin the dubbing onto the thread and form a round underbody the size of the actual egg.
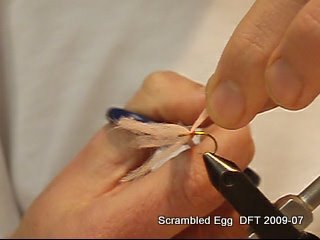
Start in the middle of the shank, cover those wraps that secure the egg yarn and end off towards the back of the hook. Your thread should be located behind the egg body at this point as this is where you will tie in the Egg Yarn. Optional : Cut away any strands of dubbing that protrude past the actual body of the fly. Step Four: You now take each piece of each yarn individually and for the ‘cocoon’ around the dubbed body. Start with the section you tied in first and that is located on the top of the shank.
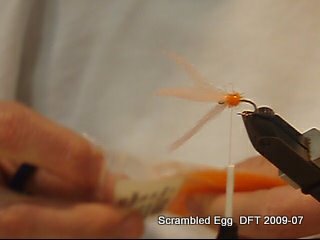
Pull it over the top and to the back of the dubbed body covering the top half of the body and while trapping it with two loose turns of thread, leave some slack in the yarn as to form a bubble in the material. You can also use a needle to ‘lift’ the Egg Yarn off of the dubbed body as to achieve the desired effect. Now repeat this step for the other two pieces of yarn covering the bottom half of the body.
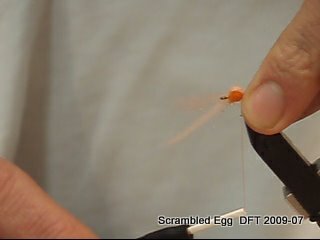
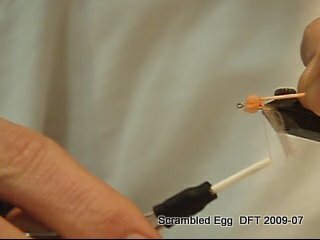
Making sure that the egg yarn covers 90% of the body in a translucent ‘cocoon’, whip finnish and cover thread wraps with head cement.
|
|

ABC
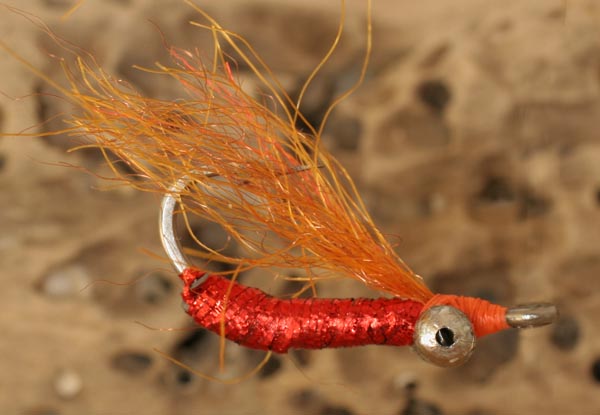
ABC (Anything But Chartreuse) |
|
Another variation of the Crazy Charlie. |
|
|
|
|
Materials |
|
| Hook | SS #4 to #8 |
| Thread | 3/0 Burnt Orange |
| Eyes | Bead chain |
| Body | Orange flash |
| Wing | Burnt Orange Synthetic |
Tying Instructions |
|
| 1) Dress shank of hook and tie in bead chain eyes.
2) Tie in the flash behind the eyes and form the body by wrapping back to above the barb and forward again to behind the eyes. Tie off the Flash. 3) Coat the body with Sally Hansen’s clear nail varnish. (Its a good idea to prepare a no. of bodies and let them dry before continuing) 4) Reverse the hook in the vice to ease application of the wing . 5) Tie in the wing Charlie Style ahead of the eyes and form a neat thread head. |
|
Crippled Dun
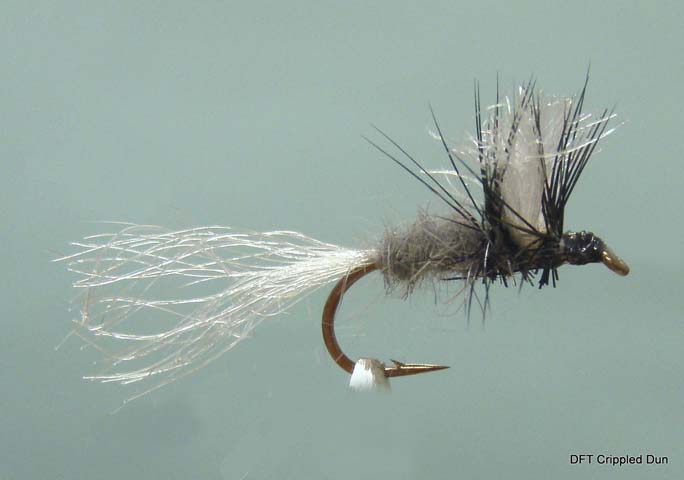
Crippled Dun |
|
A dry fly which does well for trout. |
|
|
|
|
Materials |
|
| Hook | Dry Fly #10 to #18 |
| Thread | 6/0 or finer (colour of choice) |
| Chuck | Z-Lon Grey or Dark Grey polypropylene yarn |
| Body | Grey Z Lon Dubbing |
| Wing | White polypropylene yarn |
Tying Instructions |
|
| 1) Dress shank down to above the barb.
2) Tie in the chuck, this should be longer than the hook the hook. 3) Tie in the wing leaving enough room for the head (about 1/4 from eye) using figure of 8 wraps. 4)Pull the wings upright and secure in this position using a few wraps of thread around the base. 5)Return the thread to the point where the shuck is tied in. Dub the thread forming a tapered noodle. Note: When viewing from the top the dubbing should be twisted in a clockwise direction to prevent unwinding as it is wrapped around the hook shank. (reverse for Left Handed tyers) 6) Wrap the dubbing forward forming a tapered body. 7) Tie in the hackle just behind the wing with the tip toward the back of the fly. 8) Dub the hoohshank right up to the eye forming the thorax and head. 9) Now wrap the hackle forward, two turns behing the wing and two turns in front, Tie off and whip finish. 10) Pull the wing upward and trim just above he hackle tips. 11) Turn the fly and trim the hackle directly below the body forming an inverted V when viewed from the front. |
|
Salty Bugger
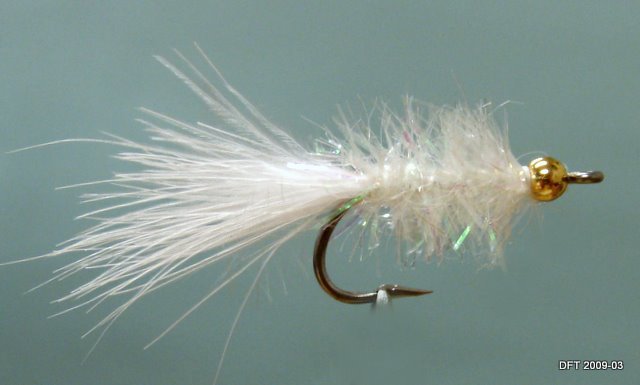
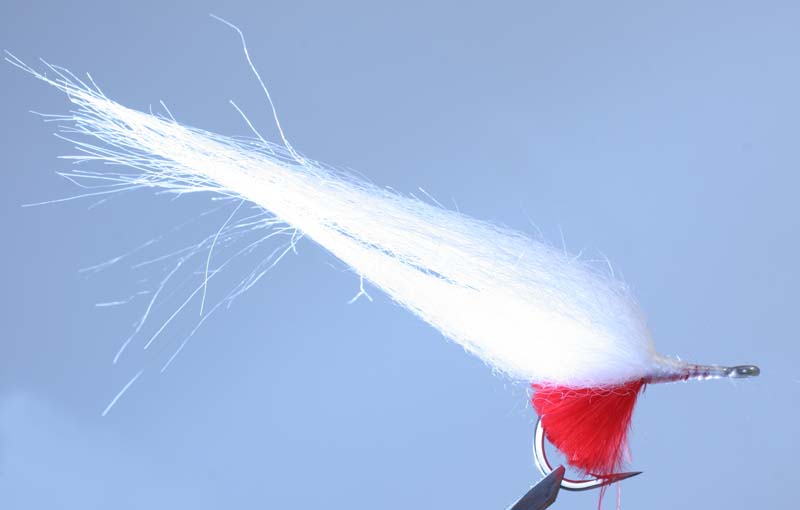
Salty Bugger |
|
This fly is fished with a floating line in rip currents in surf, bays or estuaries. |
|
|
|
|
Materials |
|
| Hook | Salt Water #2 to #4 |
| Thread | 3/0 White or mono. |
| Tail | White Marabou |
| Body | White Sparkle dubbing or dubbing brush. |
| Eyes | Brass Bead |
Tying Instructions |
|
| 1) Crimp the hook barb and slide on a brass bead.
2) Dress the hook shank with thread down to above the barb. 3) Tie in the Marabou tail above the barb. A strand or 2 of flash can be added either side. 4) At the same point form a dubbing loop and using sparkle dubbing spin a bushy dubbing noodle. 5) Wrap this forward to the bead and tie off. 6) Pinch the marabou tail to length. |
|
The Good Doc’s Beetle
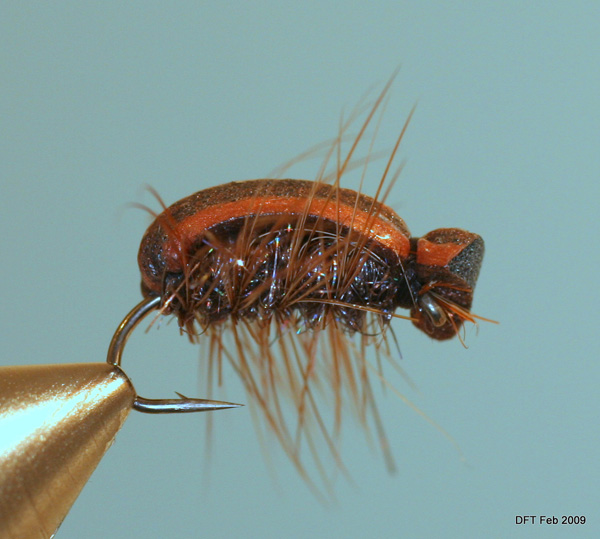
The Good Doc’s Beetle |
|
A local dry fly that is especially deadly for yellowfish. |
|
|
|
|
Materials |
|
| Hook | Grip 12804 #12 to #16 |
| Thread | Black 3/0 |
| Upper Body | Sparkle Dubbing |
| Body | 2-3 mm Black High Density Foamb |
| Body Prep | Paint with Heritage Metalic Bronze |
| Legs | Brown or Furnace Hackle |
Tying Instructions |
|
| 1) Prepare the foam by cutting into strips with a craft knife. The top should be beveled at 45 deg on both sides. (width to suit hook size)
2) Paint the prepared strips on both sides with the bronz metallic craft paint and hang to dry. Before it hardens give an overcoat of Heritage Seal Skin. 3) Hang the strips to dry. 4) Dress the shank of the hook with thread and before the paint hardens tie in a strip of foam behind the hook eye flat side up. 5) Stretch the foam back toward the bend of the hook and tie down the foam in open turns finishing above the barb with an no. of tight wraps. 6) Strip the filoplume off the hackle and tie in at this point with the tip facing back. 7) Form a dubbing noodle and dub over the foam underbody forward to behind the hook eye. 8) Palmer the hackle forward to the same point and tie off. 9)Pull the foam body over the top and tie off just behind the hook eye. 10) Clip the excess foam forming the beetles head. |
|
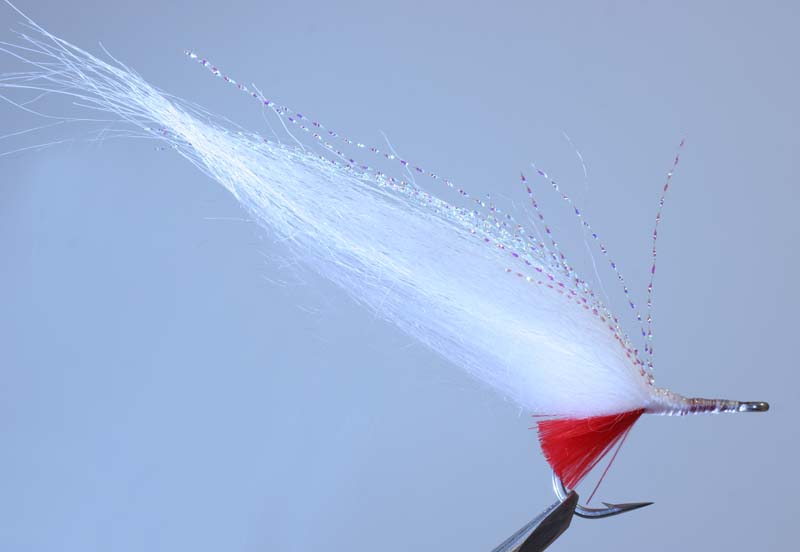
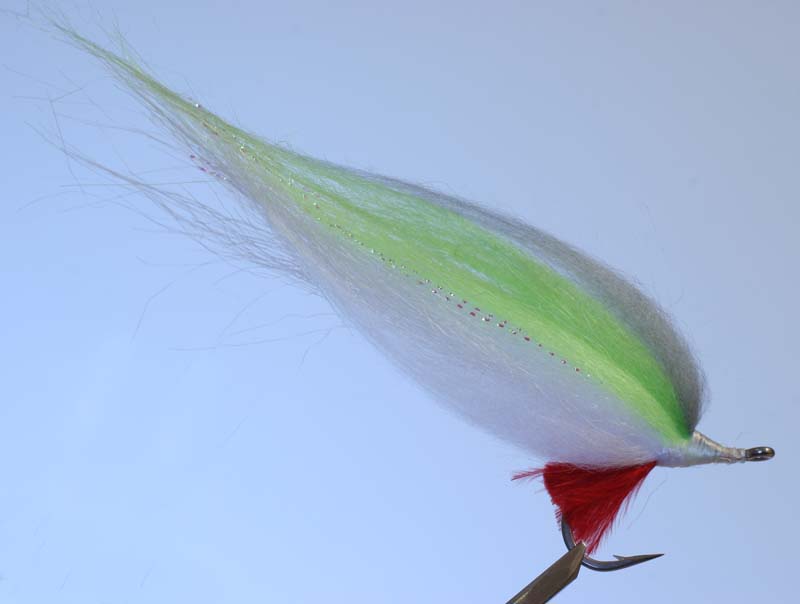
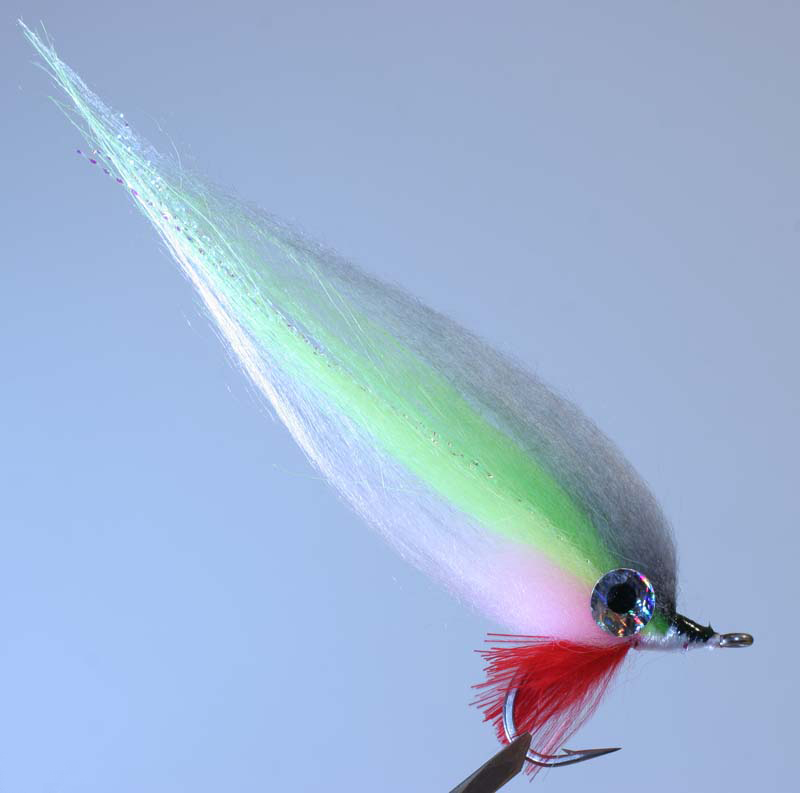
Hi Tie
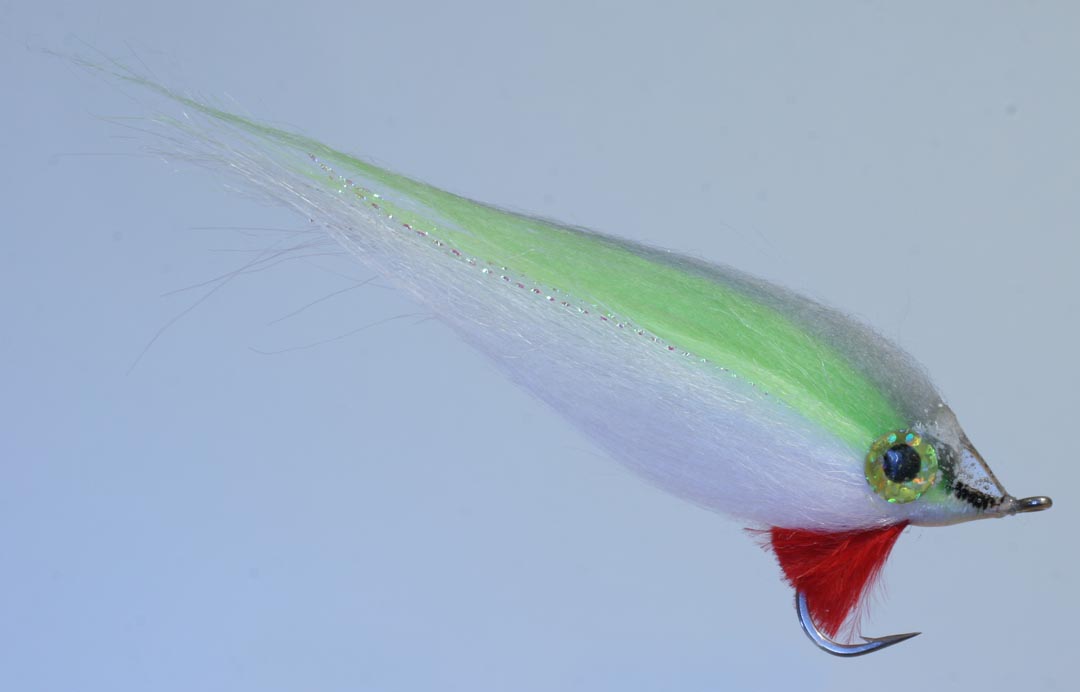
Hi Tie |
|
A Bait fish imitation |
|
|
|
|
Materials |
|
| Hook | SS Short Shank 1/0 to 2/0 |
| Body | Polar Fleece Colour of Choice |
| Head | Holographic Eye’s + Epoxy |
| Flash | To match |
Tying Instructions |
|
| 1) Tie in a small piece of red marabou (or Hot Pink Polar Fibre) under the hook above the barb.
2) Tie in a small bunch of Polar Fleece at the same point above the hook. Repeat with a second bunch on top but slightly forward.
3) Tie in a few strands of flash on top.
4) Then Tie in a small bunch of chartreuse followed by green and finally grey. (Experiment with various colour combinations.)
5) Comb the body to shape then using superglue glue eyes in place.
6) Finally when super glue is dry colour the head area with marker pen and build up some epoxy over the front of the eye and head.
|
|
Tying Tip |
|
| When cutting the Polar Fleece turn the material upside down and cut a small rectangle out by inserting a sharp pair of scissors just under the fabric weave as shown. Then hold the fibre and snip off the fabric weave. Comb out the excess fibres. | |
Variation |
|
|
|
|

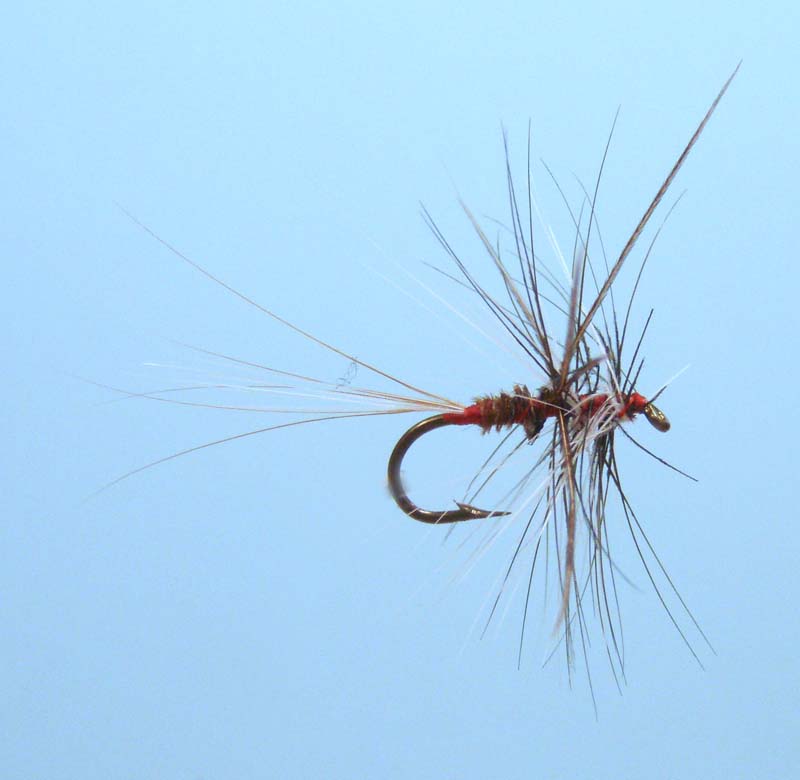
RAB
RAB |
|
One of SA’s most famous dry flies, the Red Arsed Bastard |
|
|
|
|
Materials |
|
| Hook | Dry Fly 12-16 |
| Thread | Red 6/0 or finer |
| Tail | Hackle Fibres |
| Body | Pheasant Tail |
| Legs | Pheasant Tail |
| Hackle | Brown or Furnace and White or Cream Hen |
Tying Instructions |
|
| 1) Dress the hook shank with thread.
2) Tie in a mixture of white and brown hackle fibres above the barb. 3) Wrap the thread forward 1/3 of shank. 4) Tie in a bunch of about 5 pheasant tail fibres at their mid point with the tips pointing forward. 5) Wrap the butt ends of the pheasant tail forward forming a body and tie off . 6) Spread the pheasant tail tips evenly around the hook shank and secure in position with a few wraps. 7) Tie in the Brown hackle just ahead of the legs with the shiny side and tip facing back. 8) Tie in the other hackle behind the hook eye with tip facing forward (leave enough room for a small thread head) The thread should now be just behind the hook eye. 9)Wrap the brown hackle forward to where the thread is. 10) Wrap the thread back through the hackle to just in front of the legs. Trim off the brown hackle tip. 11) Now wrap the white hackle back through the brown hackle toward the legs then wrap the thread forward to behind the hook eye securing the hackle in place. 12) Form a small thread head and tie off. |
|
Tom’s Gully Fly
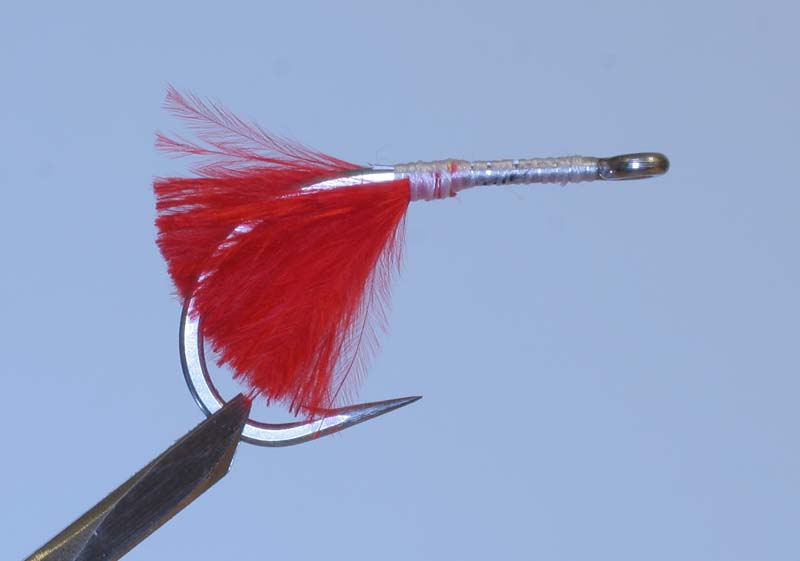
Tom’s Gully Fly |
|
Ties by Tom Gifford to fly fish gullies. |
|
|
|
|
Materials |
|
| Hook | Gamakatsu SC15 #4 #2 |
| Thread | 3/0 or finer (colour of choice) Pref Red Head |
| Eyes | Black bead chain |
| Body | Yarn Colour of choice |
| Wing | Pearl Crystal Flash |
Tying Instructions |
|
| 1) Dress shank of hook and tie in bead chain eyes.
2) Form a nice body with thread (colour of choice) behind the eyes. 3) Super glue or cement the body and eyes. (Its a good idea to prepare a no. of bodies and let the glue dry before continuing) 4) Reverse the hook in the vice to ease application of the wing . 5) Take a small pinch of pearl Crystal Flash and tie in between eyes and hook eye. 6) Form a neat thread head with preferably red thread. |
|

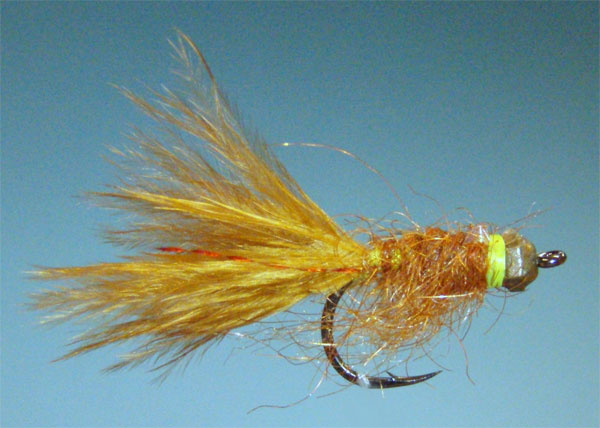
MSK (Mikes Scalie Killer)
MSK (Mikes Scalie Killer) |
|
A yellowfish variation of the woolly bugger. |
|
|
|
|
Materials |
|
| Hook | Daiichi DHSS #3 or smaller |
| Thread | Chartreuse 3/0 or finer |
| Head | Tungsten Bead pref. faceted |
| Tail | Filoplume from Schlappen Hackle + Flash |
| Body | Sparkle dubbing |
| Rib | Fine Copper Wire (optional) |
| Wing Case | Flashabou |
| Legs | Teased out dubbing |
Tying Instructions |
|
| 1) Thread bead onto hook and dress the hook shank with thread to above the barb.
2) Cut a bunch of filoplume from the base of a hen hackle. Tie this in above the barb using the pinch method. 3) Tie in one strand of flash either side of tail as well as the copper wire for rib if desired. 4) Form a dubbing noodle at the tail tie in point and wrap forward 2/3 along hook shank forming the body. 5) At this point tie in the flash for the wing case on top of the hook. 6) Carry on dubbing in front of the flash right up to the bead. 7) Pull the flash over the top forming the wing case and tie off behind the bead. 8) Keep wrapping the chartreuse thread behind the bead forming a neat chartreuse band behind the bead. 9)Whip finish and apply a small amount of head cement. 10) This fly is very effective for Natal Scalies especially when the water is not clear and can be tied in browns and greens. |
|
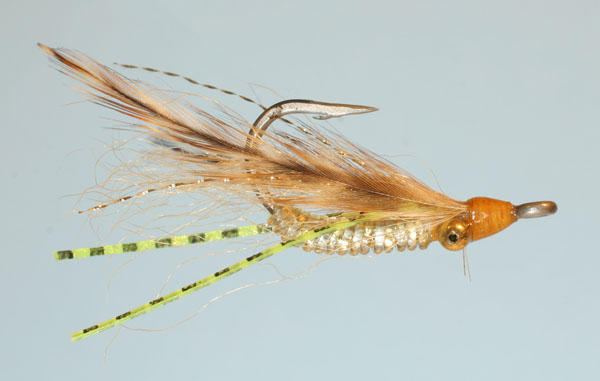
Winged Charlie
Winged Charlie |
|
This is a variation of the Crazy Charlie. |
|
|
|
|
Materials |
|
| Hook | # 4 or 6 (stainless steel) |
| Thread | Personal preference |
| Wing | Calf tail / 2 Hen Hackle’s Rubber Legs flash 2/4 strands |
| Body | Flashabou / Gliss n Glow and monofilament 7 to 10 kg |
| Head | Bead chain / Dumbbell epoxy |
Tying Instructions |
|
| 1. Dress hook, tie in eyes behind hook eye allowing enough space to tie in the wing and flash.
2. Tie in a length of monofilament and two or three strands of flashabou or Gliss n Glo of a colour of your choice at the bend above the barb. 3. Wrap the flash forward to between eyes and secure. Wrap the monofilament over the flash in the same way and tie off. 4. Tie in the Calf Tail very sparse allowing it to extend past the bend by 5 to 10 mm. Tie in the flash on top of wing. Finally add the Hackle. 5. Form a neat head with the thread and epoxy. |
|
 D5 Creation